


The last Home Server article discussed the benefits, functions, and hardware related to setting up a home server. Some of these functions included a file backup system and a media centre. By now you have hopefully selected the appropriate hardware needed to create your home server. The next step is installing the operating system. While this article will install Ubuntu Desktop 14.04, there is also a server edition of Ubuntu. I chose a desktop version because of its ease of use. (The server edition is designed for computers without displays or monitors). Before starting, ensure that you have the following hardware:
- Computer/Laptop with at least
- 700 MHz processor
- 512 MB RAM
- 5 GB hard drive space
- CD/DVD drive or USB port for the installer
- Internet Access
- CD or USB memory stick for installing Ubuntu.
- Another computer with internet access to create the install CD/USB
Watch the Install Process on YouTube:
Creating the CD/USB install media
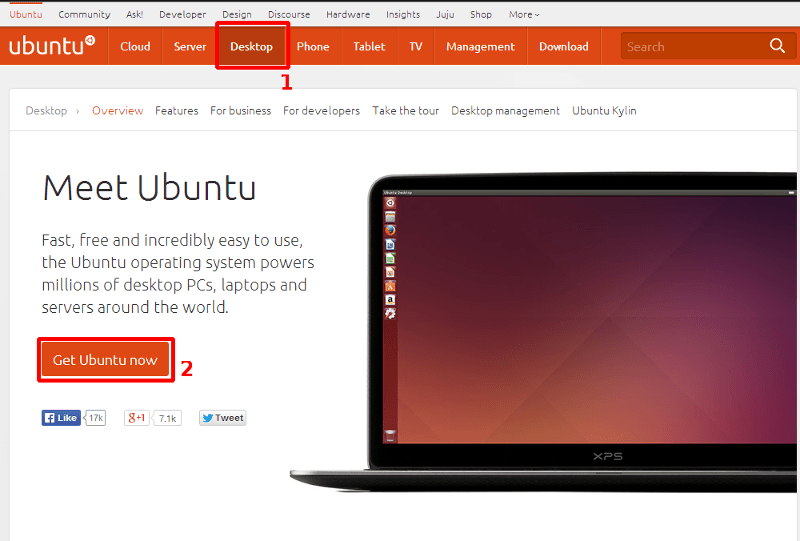
- Head over to Ubuntu’s website, www.ubuntu.com, click on ‘Desktop’ in the horizontal navigation at the top of the screen, then click on the orange ‘Get Ubuntu now’ button at the centre of the screen.
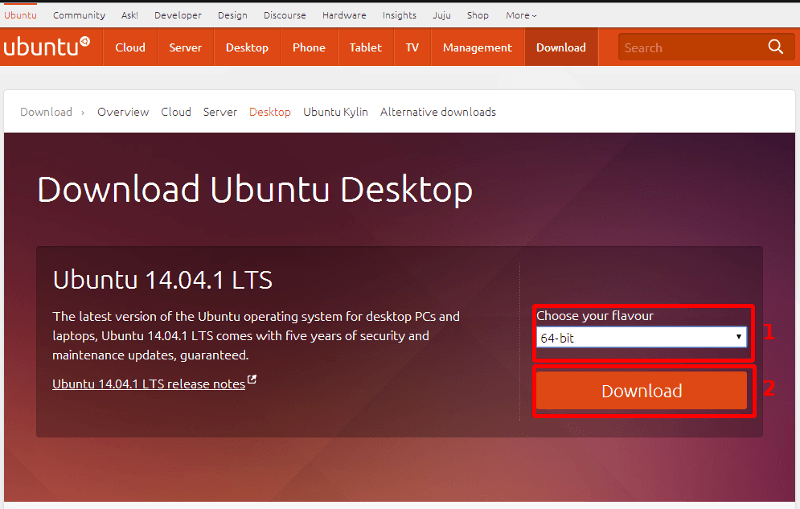
- At the next screen, in the drop down menu under “Choose your flavour” you can choose whether to download the 64-bit, 32-bit, or 64-bit MAC version of Ubuntu. These reference different types of hardware similar to whether a car is a sedan, hatchback or SUV. One is specifically for Apple products, the 64-bit and 32-bit refer to the complexity of calculations the computer can do. If your hardware is newer than 2006, it is most likely 64-bit; however, if you are unsure, you can just choose 32-bit as it will also work on a 64-bit computer. Then click ‘Download’. The next screen will give you the option to donate. At the bottom of the page will have a link ‘not now, take me to the download’ if you choose not to donate. It will begin to download to your computer.
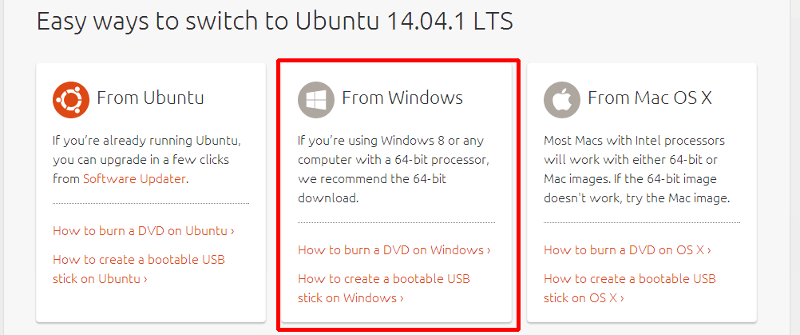
- After the download has finished, you will need to create a bootable CD or USB. This article will guide you through creating a bootable USB. Once again, click on ‘Desktop’ in the horizontal navigation at the top of the screen and click on ‘Get Ubuntu now’. This time, scroll down the screen until you see three columns of text. The centre column will have a link about ‘How to create a bootable USB stick on Windows’.
- Once you have clicked on the link to create a bootable USB stick, it will take you to instructions to create the USB. As per the instructions, you will need to download a program called Universal USB Installer and point the program at your USB stick and Ubuntu file. Once the installer is complete you can now install Ubuntu onto your home server. NOTE: This will erase all data on the USB stick.
Installing Ubuntu
- Eject the USB stick and insert it into the computer that will become your home server. Power on the computer. If it doesn’t automatically boot from the USB, you may need to try again and tap a function key like F8 or F12 to open a boot menu. The specific key is dependant on the brand of computer. When you turn on the computer, the first screen (which usually has the computer brand at the centre) will display the correct key to press to start the boot menu. Once you have selected USB from the boot menu, you will arrive at a screen that looks like the following:
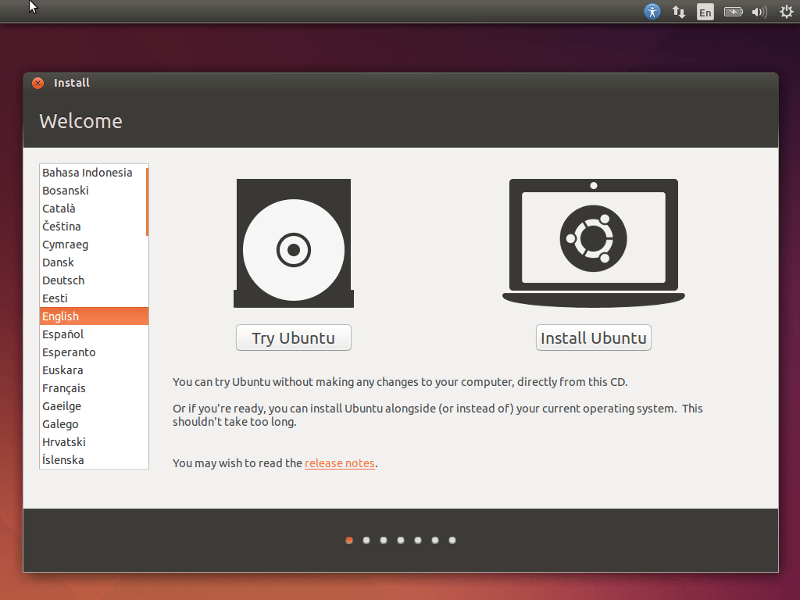
- Click on ‘Install Ubuntu’ to begin the install process. Many of the instructions are self-explanatory, such as naming the computer and selecting time zones; however, one page in particular is important:
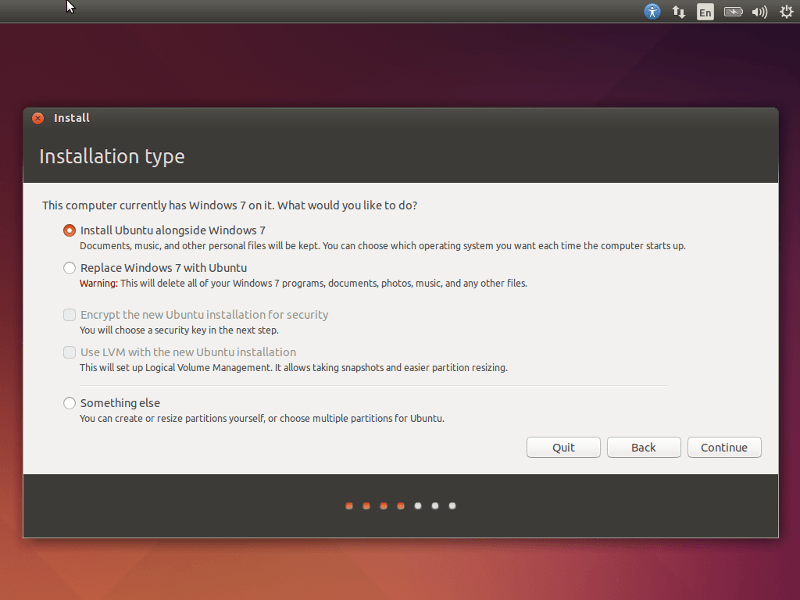
The installation type options are less intuitive and have major ramifications if chosen incorrectly.
- Install Ubuntu alongside Windows 7: keeps all the files of the previous operating system (in this case, Windows 7). You don’t have to worry about backing up files from this computer; however, you have less space for server programs and the install process of Ubuntu is greatly increased.
- Replace Windows 7 with Ubuntu: this selection erases the hard drive and then install Ubuntu. Whatever operating system and files on the computer will be deleted. Backing up old files on the computer is important with this selection.
- Encrypt the new Ubuntu installation for security: you must replace the current operating system if you want this option. It prevents others from extracting data directly from the hard drive if someone takes the hard drive out of the laptop.
- Use LVM with the new Ubuntu installation: this selection allows resizing of partitions, sections of the hard drive, and easier backup of the entire system.I would suggest replacing the current operating system, but if you are concerned about losing files, install Ubuntu alongside the current operating system. You most likely do not need to choose any of the other options.
- Once Ubuntu is done installing, reboot the computer and you will reach the login screen.
- After you enter your password you will reach the following page:
Congratulations, you have now installed Ubuntu Desktop onto your home server! Next time we will make our server accessible outside of our home.
Support Us!
Thank you for reading this article. If you found it useful, please consider buying us a coffee, subscribing to the YouTube Channel, and/or changing your Amazon bookmark to our affiliate link (CAN, USA, UK). We do this out of general interests and to help others. Thanks!


Leave a Reply