


Pydio is an open source self-hosted alternative to online cloud service providers. This software provides additional privacy by storing files on local computers and removes the small storage limitations that online service provides offer. Pydio boasts features such as monitoring the number of times files are downloaded and can share files to internal or external users. Learn how to install and setup Pydio in Ubuntu 14.04.
Contents
Screenshots

Prerequisites
This tutorial assumes that you already have an Ubuntu Desktop computer setup with a web address (dynamic or static dns). Use the following tutorials to setup a computer with these requirements.
- Creating a Home Server Part 1: Why Should I? Hardware and Software
- Creating a Home Server Part 2: Installing the Operating System
- Creating a Home Server Part 3: How to Install No-IP Client in Ubuntu
Video Tutorial
Written Instructions
If you already installed ownCloud using our tutorial, you already have a LAMP server installed. Skip to Installing Pydio.
Installing a LAMP Web Server
LAMP stands for Linux Apache MySQL Php/Python/Perl, which are the components of creating a web server. Previously, the acronym was used to remember which packages to install, but now we can install them all in one step.
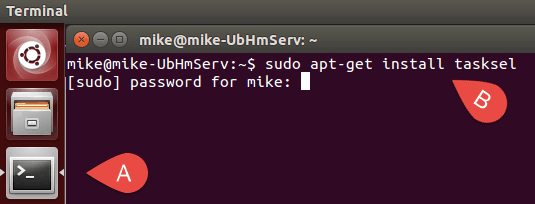
- Open Terminal (A) and type the command to install “Task Select” (B). You will need to enter your password.
sudo apt-get install tasksel
- Once the install is complete, run Task Select.
sudo tasksel

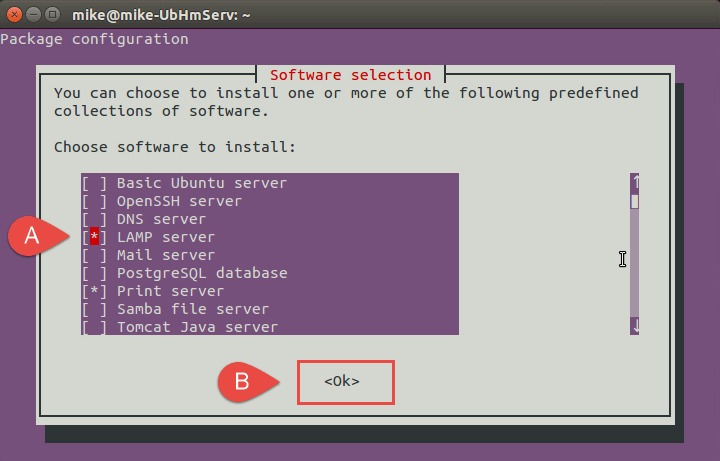
- Use the arrow keys to navigate to “LAMP server” using the keyboard arrow keys, press the “Space bar” to select the option (A), then press the “Enter” key to confirm (B)
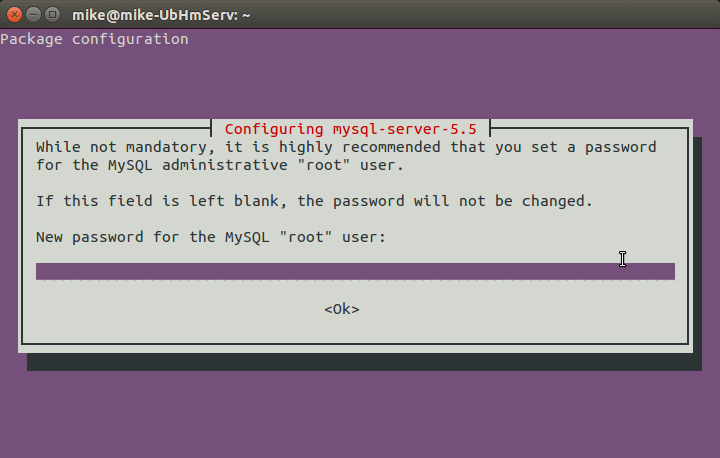
- The install will ask for a password for the “root” use of MySQL. Create and enter a password and confirm it on the next screen.
- When the installation is complete, the LAMP Web Server will be setup and running.
Modify Extensions
- In Terminal, enter the following commands
sudo a2enmod rewrite
sudo php5enmod mcrypt
- Disable PHP Output Buffering my modifying the configuration file.
- access the config file.
sudo nano /etc/php5/apache2/php.ini
- Find the section for PHP Output buffering.
- Change output_buffering from “4096” to “off”
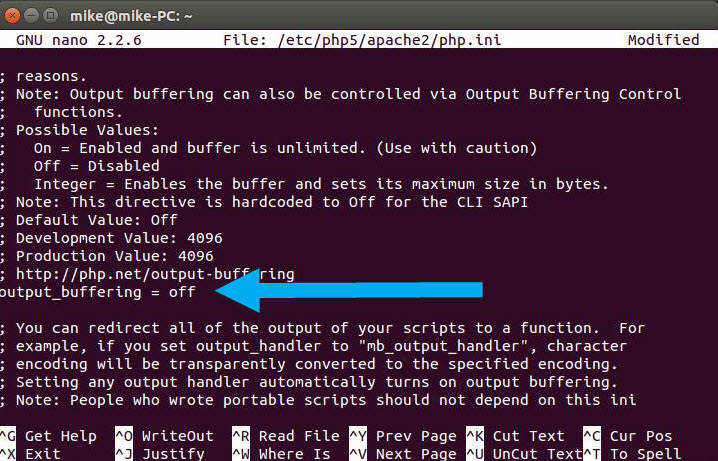
- Use Ctrl+O to save and then Ctrl+X to exit the text editor.
- access the config file.
Create a Database in MySQL
- In Terminal, login to mysql with the following command. It will prompt for a password. Use the password created when installing the LAMP web server.
mysql -u root -p
- Create the database pydio.
create database pydio;
NOTE: For increased security, choose a database name that is not the same as the default, pydio.
- Exit mySQL
exit
NOTE: For even more security, create a user within MySQL that only has permissions for the database for Pydio.
Install Pydio
- In Terminal, edit the program sources fie using the following command.
sudo nano /etc/sources.list
- Using the arrow keys to navigate the the bottom and then copy and paste the following two lines into the file.
deb http://dl.ajaxplorer.info/repos/apt stable main
deb-src http://dl.ajaxplorer.info/repos/apt stable main
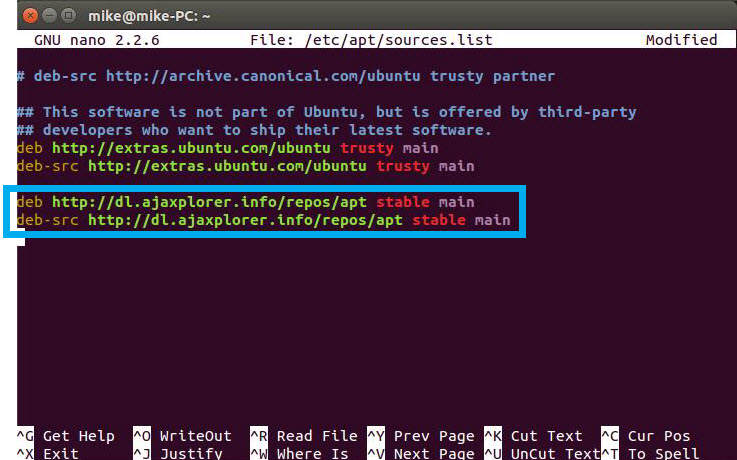
- Use Ctrl+O to save and Ctrl+X to exit the text editor.
- Add the public access key.wget -O – http://dl.ajaxplorer.info/repos/[email protected] | sudo apt-key add –
- Update the program sources database
sudo apt-get update
- Install Pydio. You will need to confirm the packages that will be installed.
sudo apt-get install pydio
- Copy the configuration file to the web server.
sudo cp /usr/share/doc/pydio/apache2.sample.conf /etc/apache2/sites-available/pydio.conf
- Activate the site.
sudo a2ensite pydio
- Restart the web server.
sudo service apache2 restart
Setup Pydio
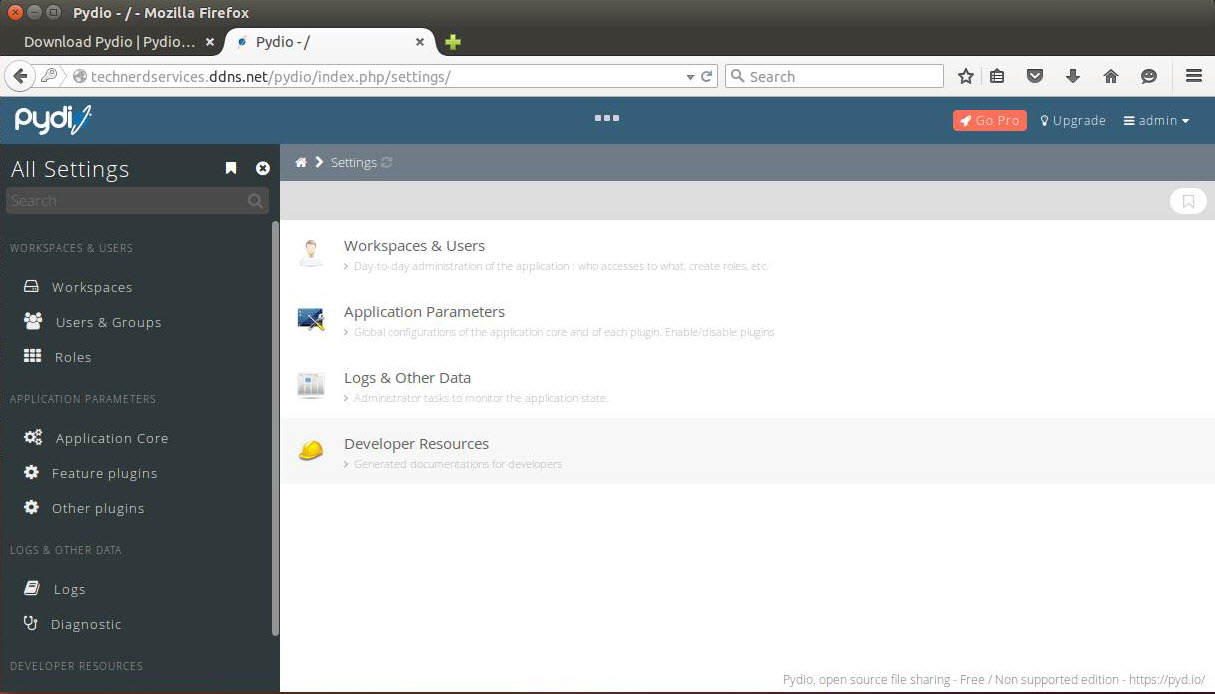
- In a web browser, navigate to your computers web address or IP address. Append “/pydio” as a fragment to the web address (i.e. technerdservices.ddns.net/pydio).
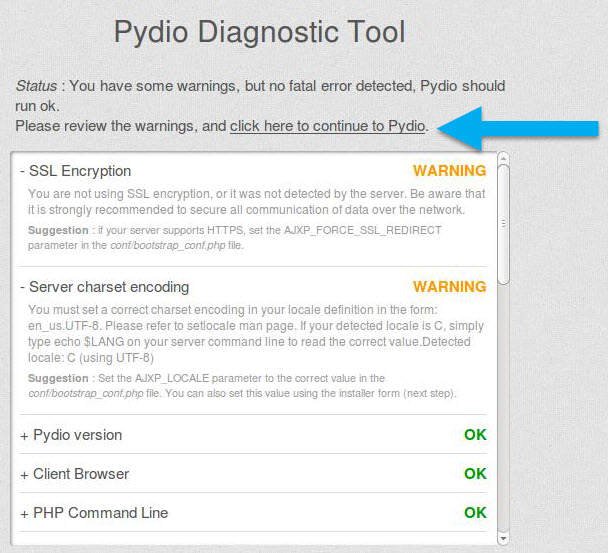
- The diagnostics tool should show two warnings. If it shows more (such as PHP Output Buffering Disabled), ensure that all previous steps have been completed. Click the “click here to continue to Pydio” hyperlink.
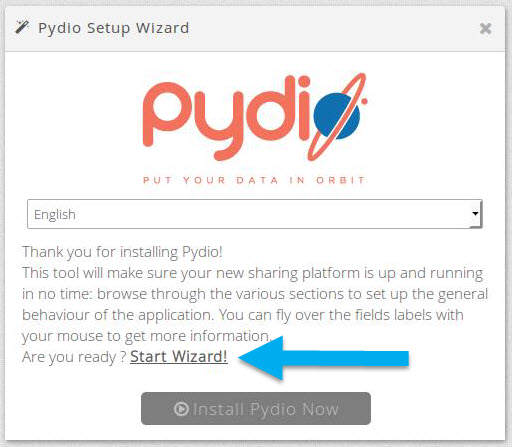
- Select the desired language and click the “Start Wizard” hyperlink.
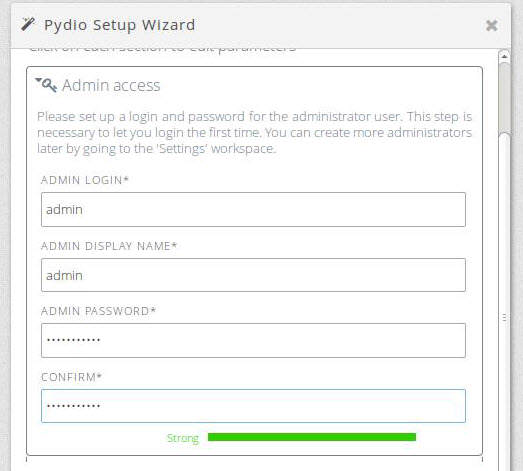
- Click on the “Admin access” section. Create the administrator account. Pydio will not install unless the administrator password is strong.
- Click on the “Global options” section. Most fields can remain the defaults. If desired, change the “Application Title” and “Welcome Message”
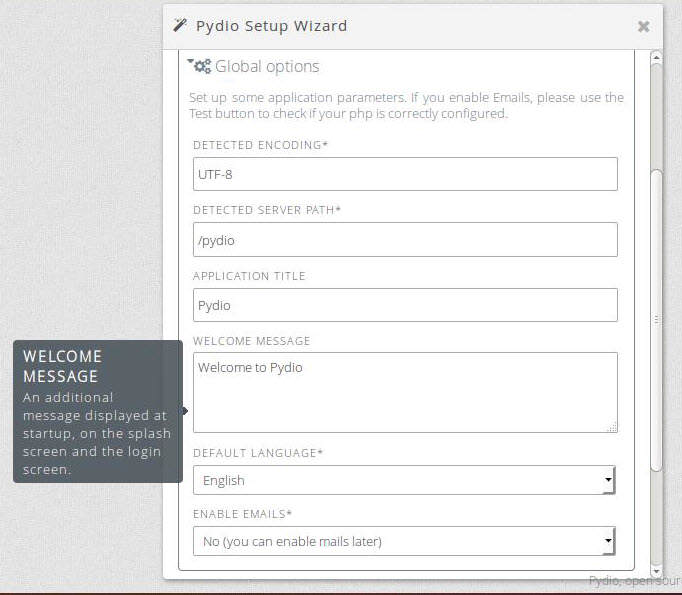 NOTE: It is possible to enable email notifications. If required, additional extensions are needed. Change the option in “Enable Emails.” To find more instructions regarding setting up the back-end, click here.
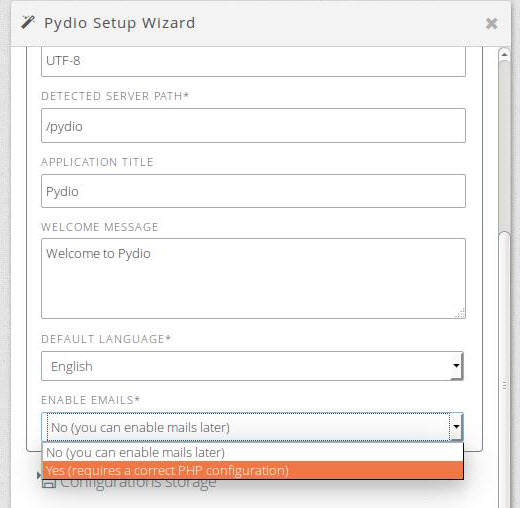
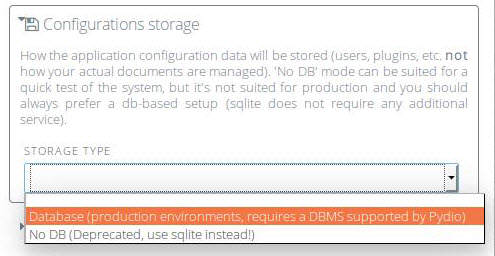
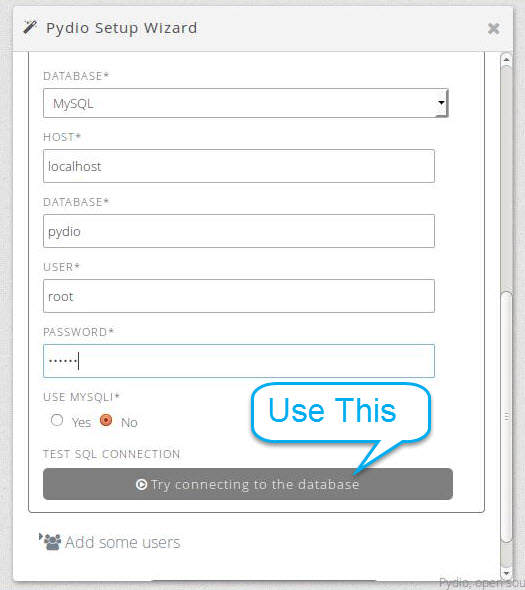
- Click on the “Configuration storage” section. Under “Storage Type” select “Database” and more fields will appear.
- Select a “MySQL” database. For the host and database fields, use the default (unless you created a database with a different name). Type in the user “root” and the password created when creating the LAMP server. Click the “Try connecting to the database” button to ensure all information is correct.
- In the “Add some users” section, you can created additional users. (This step can also be done within the Pydio settings later). Click on the :Install Pydio Now” button when complete.
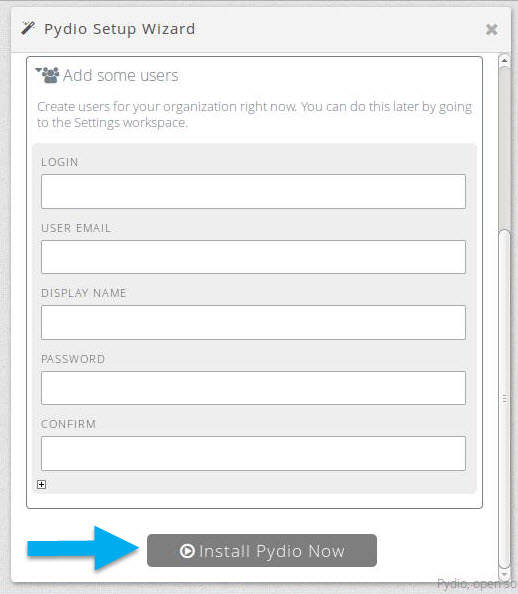 NOTE: if the “Install Pydio Now” button is not clickable, ensure that the administrator password is a strong password.
 - Pydio will require changes to a file is does not have access to. Copy all the highlighted text.
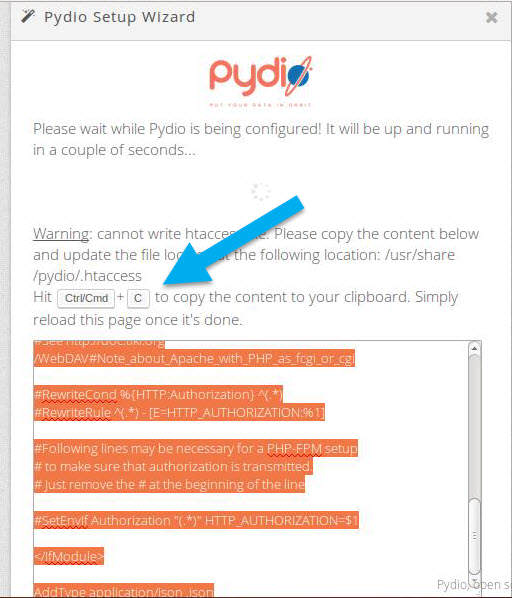
- In Terminal, open the required file.
sudo nano /usr/share/pydio/.htaccess
- Delete all the contents within the file and then paste the new content into the file.
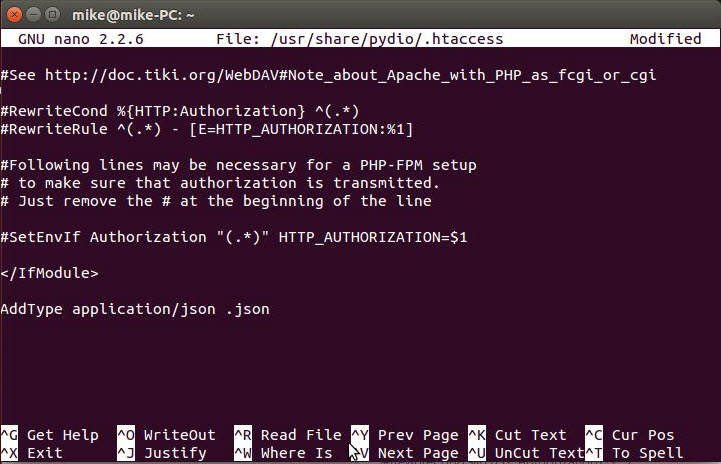
- Use Ctrl+O to save and Ctrl+X to exit the editor.
- Return to the web browser and refresh the screen.
Congratulations, you have successfully installed Pydio!
Final Thoughts
Throughout the past several years, Free and Open Source Software (FOSS for short) have gained in popularity. While big companies such as Microsoft and Google offer their solutions for file storage, they lock in users to use their other products. As alternatives such as Pydio emerge, many additional products such as ownCloud and OnlyOffice provide competition. The more companies and individuals research about possible solutions for their businesses, the more time and money can be saved in the future.
Support Us!
Thank you for reading this article. If you found it useful, please consider buying us a coffee, subscribing to the YouTube Channel, and/or changing your Amazon bookmark to our affiliate link (CAN, USA, UK). We do this out of general interests and to help others. Thanks!


Leave a Reply