Installing Ubuntu Desktop
Now that the installation media is ready, the computer where Ubuntu will be installed needs to be restarted or turned on. By default, many computers are not set to boot from a DVD or USB drive. Therefore, on the very first screen that appears when a computer boots, commonly, it has a computer logo of some sort, look around the edges of the screen for a specific key to boot to a “Boot Menu.” Different manufactures will use different keys. For example, Lenovo’s typically use the Enter key while Dell’s use the F12 key. You may need to search the internet to find the specific key for your computer. Furthermore, if you do not see any instructions, let the computer restart and then click the shutdown button while holding down the “Shift” key. If this method does not reveal a boot menu option on startup, Google-ing your model is the next step.
Once the boot menu is successfully selected, it’s time to install Ubuntu.
- The first screen that will appear is to select the language of the installer. It is defaulted to English. Use the keyboard arrow keys to navigate to the desired language and hit the Enter key.

- The following screen will give an option to Try Ubuntu before installing or to Install Ubuntu. Use the arrow keys to select “Install Ubuntu” and hit the Enter key.

- Ubuntu will boot and the installer will appear. Since this is a new iteration of the installer within Ubuntu, it will ask you to reconfirm the language.

- The installer asks whether to download updates to the software that it will be installing and whether you want to make non-open source software such as the mp3 file format and flash for flash animations on webpages available to install. If you plan on using this computer for productivity, it is easier to check both of these options and then clicking the “Continue” button. These are options that will most likely be selected in the future if they are not selected in the installation process.

- This next option is to determine how Ubuntu will be installed in the computer. Up to this point, no changes have been made to the computer. However, after this step, the installer will begin writing changes to the hardware of the computer. If this installation is occurring on an old computer Windows or Mac OSX installed on the computer, it will give an option to install Ubuntu along side the previous operating system. This allows you to experiment or use Ubuntu without losing the previous operating system. This option will reduce the overall storage of the hard drive because some of the file storage will be adjusted for the Ubuntu installation. While this is inconsequential on a large hard drive. If you are using a laptop hard drive, the space can become restrictive. In the following image, the option to format (or delete) the entire hard drive is selected. (This option is also the fastest when installing Ubuntu). There are also checkboxes for security features and hard drive partitioning if necessary. If you are unsure about these options, you can leave them unchecked.

- A dialogue box will appear to confirm the changes that will be made to the hard drive. (The hard drive is the main storage device of the computer).

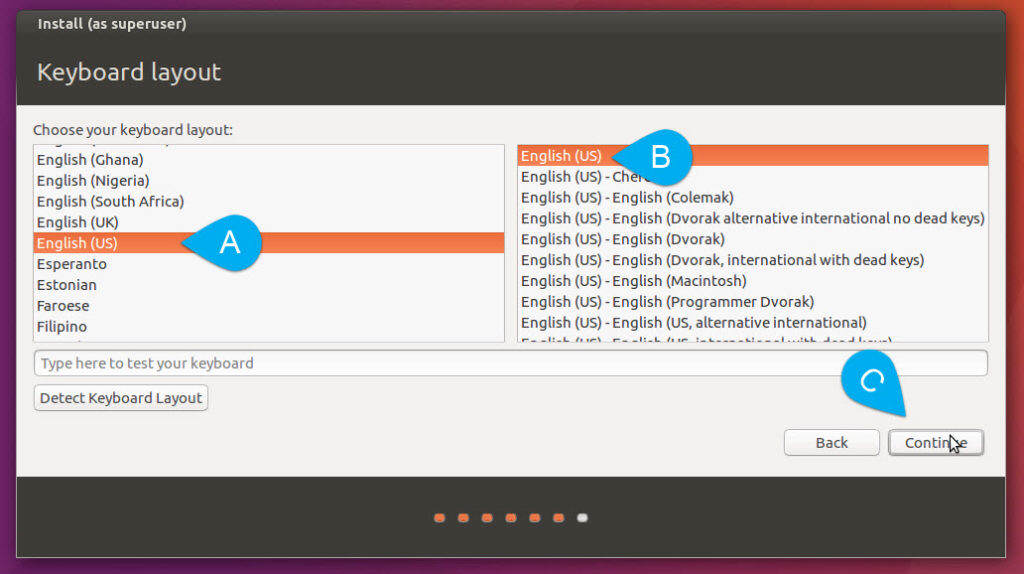
- The next two screens include choosing the appropriate time zone and keyboard settings. If the computer is connected to the internet at this point, the installer will choose the correct options. Else, you can select the correct settings.


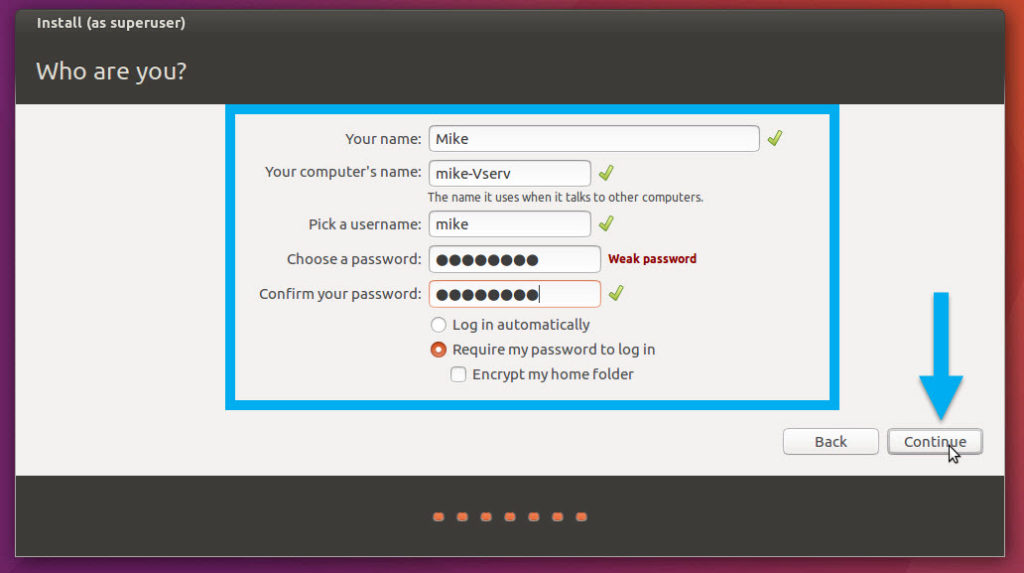
- The final page is to create the first account. Enter your name, the name of the computer and the user password in the appropriate fields. When the “Continue” button is clicked, it will initiate the installation of Ubuntu onto the computer.

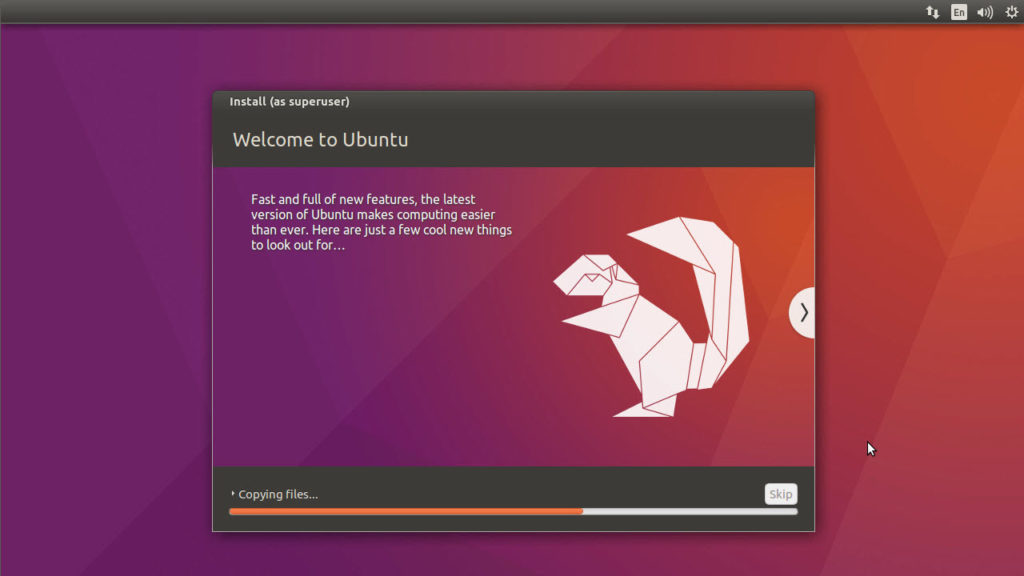
- As Ubuntu is installing, the installer will transition through slides to explain some of the features of Ubuntu. It is recommended to view the slides at least once.

- Once the installation is complete, a dialogue box will prompt for the computer to restart.

- During the restart process, another screen will prompt the removal of the installation media.
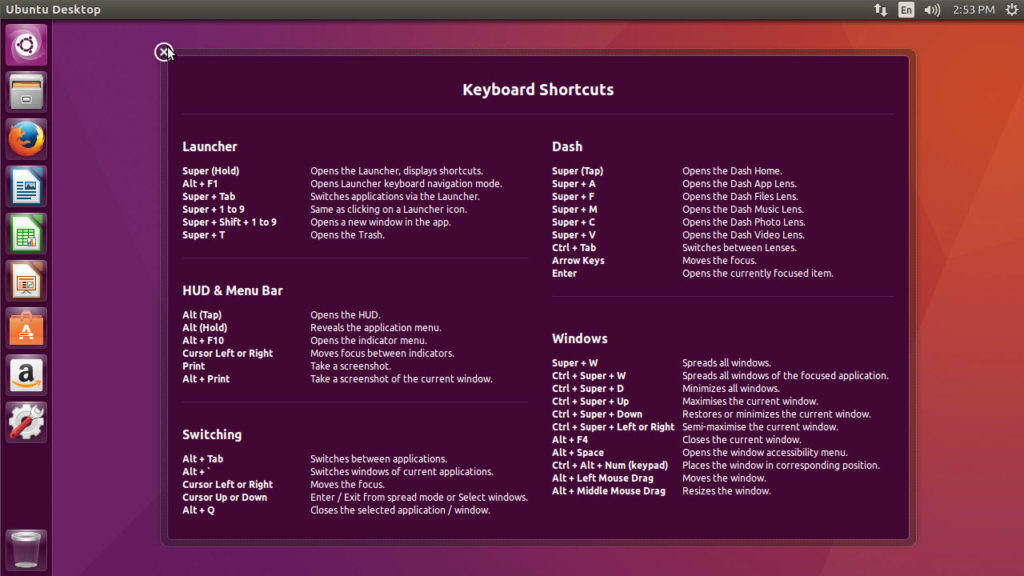
When the computer restarts, you will have a fully functional Linux Ubuntu desktop to browse the internet, watch videos, listen to music, write documents, and perform any other regular computer task. Ubuntu’s app store has several programs that it can automatically install. Many popular software have free alternatives available for Linux. A screenshot of the desktop of Ubuntu is below.
Support Us!
Thank you for reading this article. If you found it useful, please consider buying us a coffee, subscribing to the YouTube Channel, and/or changing your Amazon bookmark to our affiliate link (CAN, USA, UK). We do this out of general interests and to help others. Thanks!


Leave a Reply