BeansBooks is an Open Code cloud accounting web application that is flexible and scales easily. It simplifies accounting while providing insightful reports. Ideal for small to medium sized businesses, read on to find out how to install BeansBooks on an Ubuntu 14.04 computer.
Contents
Video Tutorial
Installing BeansBooks
Prerequisites
This installation assumes the following hardware and software components:
- Ubuntu 14.04 desktop or server computer
- a public web address
- a smtp mail server
Check out some of the previous tutorials for setting up the computer.
Getting the necessary files
These instructions are based from BeanBooks Github repository. Furthermore, these instructions assume a clean install of Ubuntu 14.04.
- Login to the Ubuntu computer and open terminal. Update Ubuntu’s package list.
sudo apt-get update
- Install necessary packages for BeansBooks:
sudo apt-get install apache2 php5 libapache2-mod-php5 php5-cli php5-mysql php5-mcrypt php5-gd mysql-server mysql-client git
Note that MySQL will require you to create and confirm a password for the ‘root’ user.
- Once the packages are installed, navigate to the web folder and archive the current web root folder
cd /var/www
sudo mv html html.old
- Retrieve the BeansBooks files from the Github repository and place them into a new html folder
sudo git clone --recursive https://github.com/system76/beansbooks.git html
- Navigate into the new html folder and create the .htaccess security file
cd html
sudo cp example.htaccess .htaccess
- Open a text editor and disable the SSL redirect. (SSL redirect is recommended an should be added before the system is exposed to an external network)
sudo nano .htaccess
Add ‘#’ in front of the following lines.
RewriteCond %{HTTPS} !=on RewriteRule ^ https://%{HTTP_HOST}%{REQUEST_URI} [L,R=301]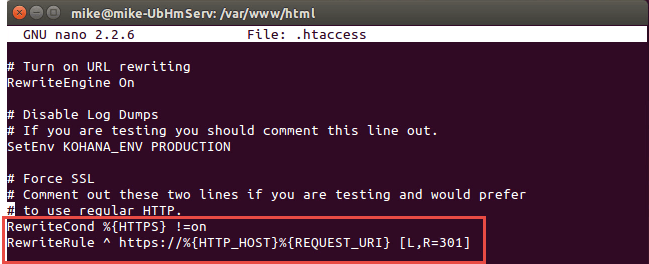 To save, press “Ctr” + “O” on the keyboard. (Do not rename the file, just confirm the save). Then exit by pressing “Ctr” + “X”.
 - Change the permissions of some folders within BeansBooks
sudo chmod 770 -R application/logs
sudo chmod 770 -R application/cache
- Then create the configuration files
touch application/classes/beans/config.php
chmod 660 application/classes/beans/config.php
- Change the permissions of the BeansBooks folder to be accessible by the web server
cd ..
sudo chown www-data:www-data -R html
Configure MySQL
- Access MySQL from terminal
mysql -h localhost -u root -p
Enter the password for the root user.
- Create a new MySQL user and password
CREATE USER 'username'@'localhost' IDENTIFIED BY 'password';
GRANT USAGE ON * . * TO 'username'@'localhost' IDENTIFIED BY 'password' WITH MAX_QUERIES_PER_HOUR 0 MAX_CONNECTIONS_PER_HOUR 0 MAX_UPDATES_PER_HOUR 0 MAX_USER_CONNECTIONS 0 ;
NOTE: don’t forget to change the username and password.
NOTE: after pressing enter after each command, MySQL should output ‘Query OK’ - Create a new MySQL database, grant the new user permissions and exit MySQL shell.
CREATE DATABASE IF NOT EXISTS `beans` CHARACTER SET utf8 COLLATE utf8_general_ci;
GRANT ALL PRIVILEGES ON `beans`.* TO 'beans'@'localhost';
exit
Note: “beans” is the name of database. Feel free to change it as necessary.
Configure Apache Web Server
- Enable the rewrite mod for Apache and mcrypt setting of php
sudo a2enmod rewrite
sudo php5enmod mcrypt
- Open a text editor for Apache’s configuration file
sudo nano /etc/apache2/sites-available/000-default.conf
- Add the following directory code after the ‘Directory Root’ line in the configuration file
<Directory PWDHERE>
    Options FollowSymLinks
    AllowOverride All
    Require all granted
</Directory>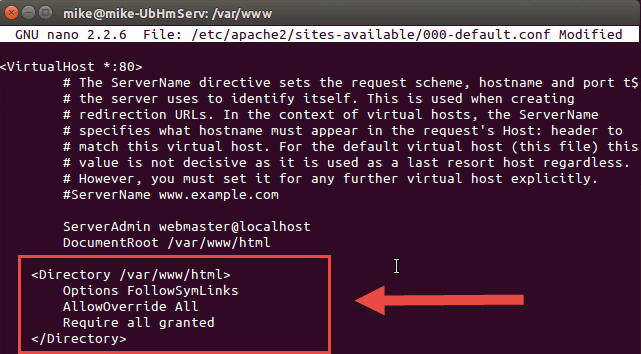
To save, press “Ctr” + “O” on the keyboard. (Do not rename the file, just confirm the save). Then exit by pressing “Ctr” + “X”. - Restart the Apache web server
sudo service apache2 restart
Installing BeansBooks
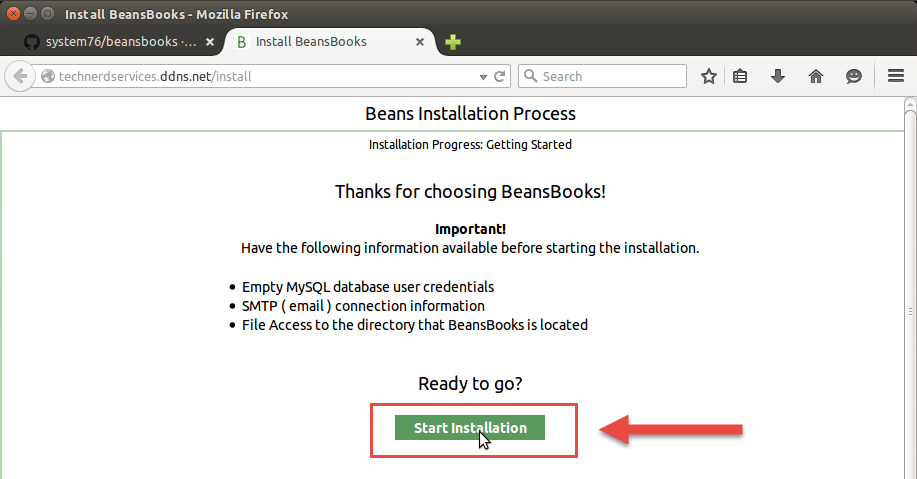
- Open a web browser and navigate to the computer’s web address and click the ‘Start Installation’ button
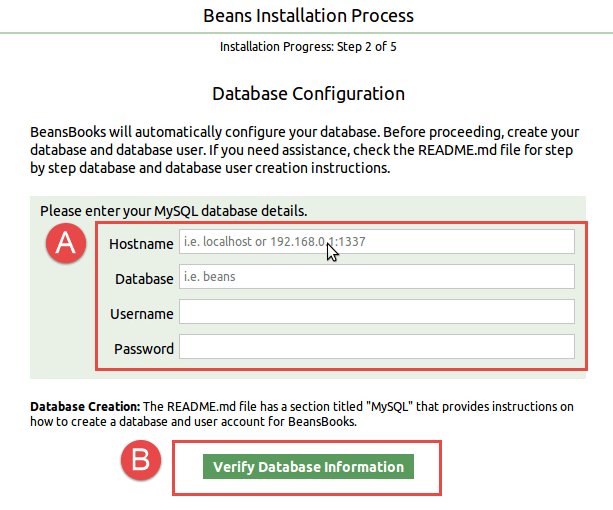
- Enter the MySQL database information (A) that was created in the Configure MySQL section. Then click the ‘Verify Database Information’ button (B)
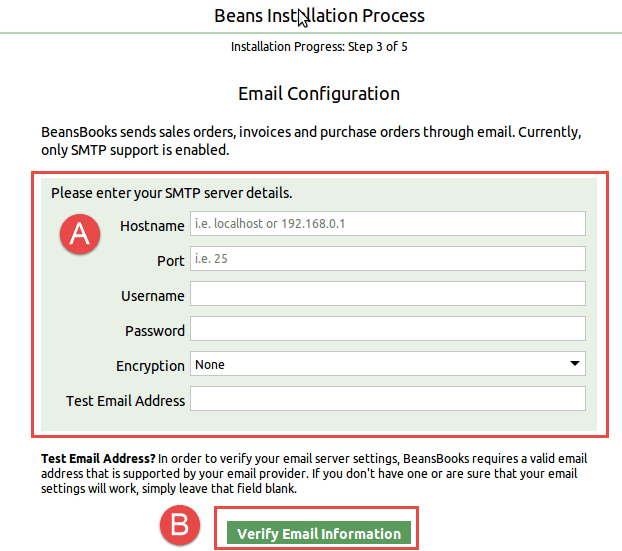
- Enter the SMTP mail settings (A). Then click the ‘Verify Email Information’ button (B)
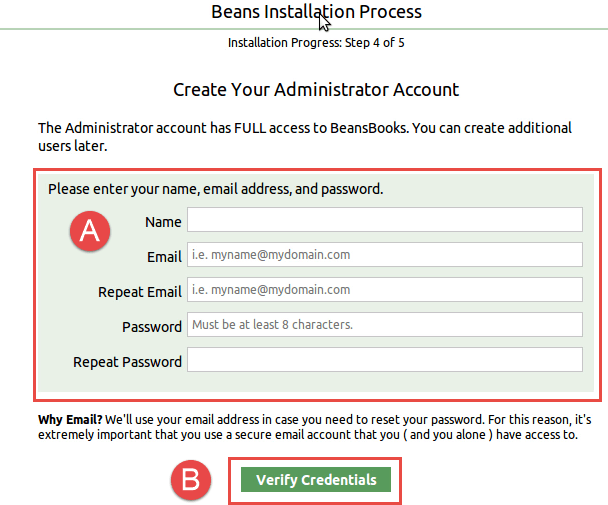
- Create the administrative account. Then click the “Verify Credentials’ button (B)
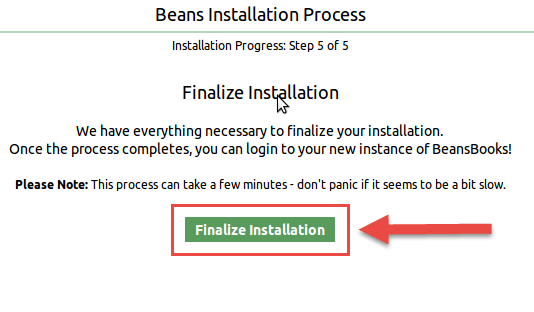
- Click the ‘Finalize Installation’ button
Your now all set! Log in to see BeansBooks.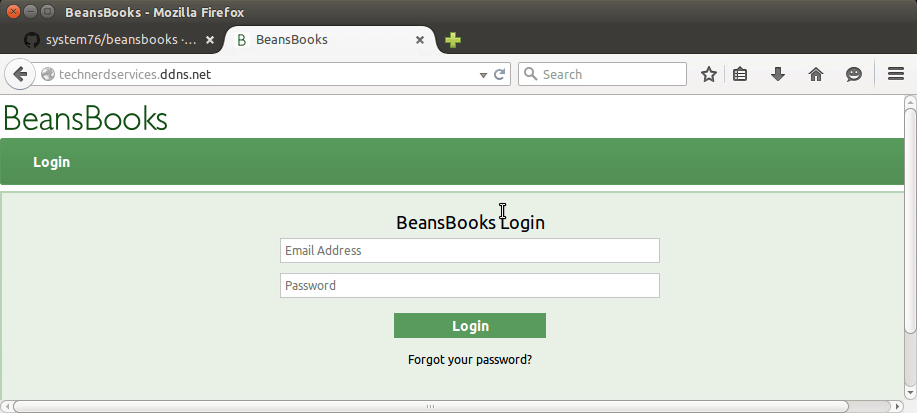
Support Us!
Thank you for reading this article. If you found it useful, please consider buying us a coffee, subscribing to the YouTube Channel, and/or changing your Amazon bookmark to our affiliate link (CAN, USA, UK). We do this out of general interests and to help others. Thanks!


Leave a Reply