


Piwigo is a free and open source online photo gallery software. It is simple to use and has many extensions and plugins to customize Piwigo. One of my favorite features of Piwigo is that ability to make some photo albums public and others private to specific users. In addition, albums can be created through folder/directory structure instead of creating them individually. Continue reading to learn how to install Piwigo Photo Gallery on Ubuntu 14.04.
Contents
Video Tutorial
Prerequisites
There are some required programs for Piwigo to function in Ubuntu. This tutorial will assume the following steps are already taken.
- The hardware and software of an Ubuntu 14.04 computer is setup.
- A LAMP web server is setup in Ubuntu.
- A public web address is setup (optional)
Install Dependencies
Piwigo only has one dependency needed to properly run: an imaging package. It recommends one of two different packages, Imagemagick or GD. We will install GD.
sudo apt-get install php5-gd
Install Piwigo Photo Gallery
- In the Ubuntu Server, open a web browser and navigate to Piwigo’s website (http://piwigo.org).
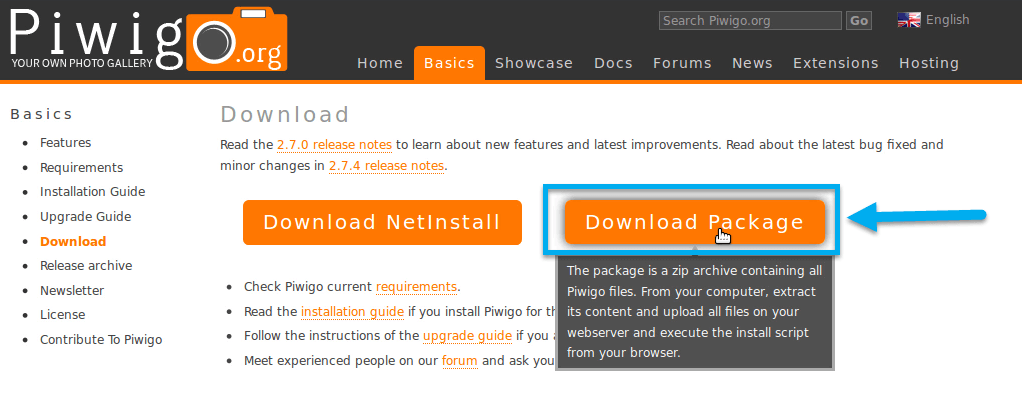
- Click on the orange “Download Piwigo” button.

- The next screen will provide two methods of installing Piwigo. Since we are installing directly from the server, the manual installation is easier. Click the orange “Download Package” button.
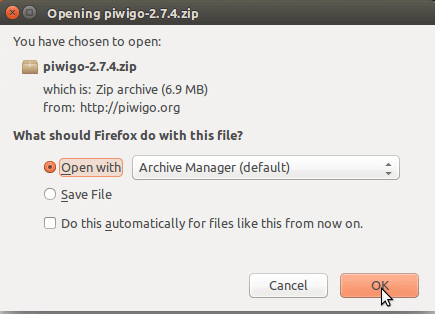
- When the browser prompts for what to do with the downloaded file, select “Open in Archive Manager.”
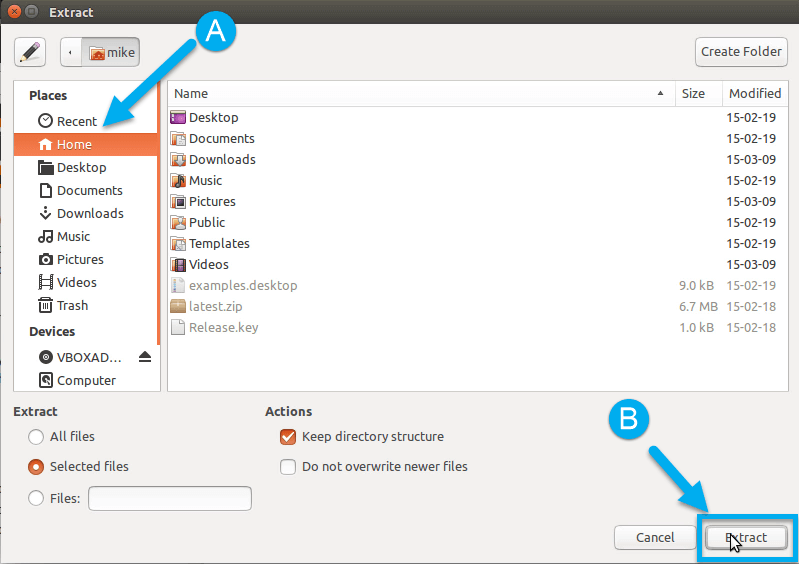
- Once the file is finished downloading, the archive manager will open. Click on the “piwigo” folder and click the “Extract” button.

- Save the folder to your “Home” directory. Click “Home” in the left sidebar (A) and then click the “Extract” button (B).
NOTE: Opening the file explorer will display the piwigo folder beside other user folders.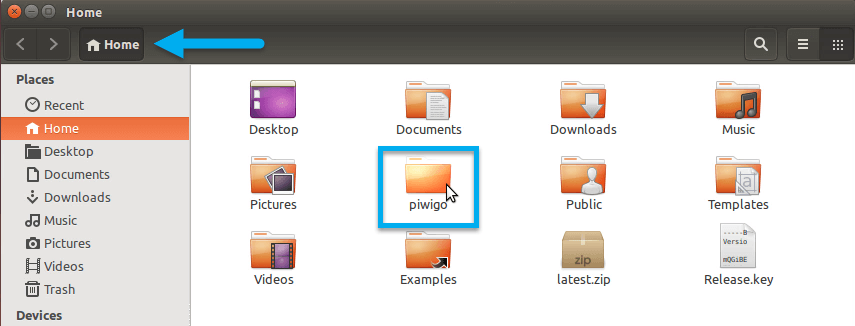
- Launch the “Terminal” program and type the following command to move the piwigo folder to the web server.
sudo mv piwigo /var/www/html

- Change the permissions of the piwigo folder to the web-server’s user ID.
sudo chown www-data:www-data -R /var/www/html/piwigo

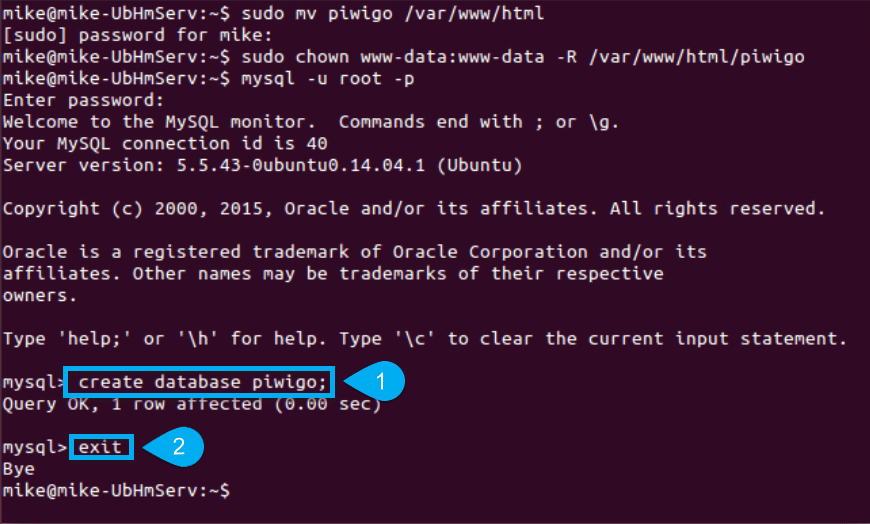
Create Database in MySQL
- Still in terminal, launch the MySQL shell.
mysql -u root -p

- create the database table titled “piwigo” and exit MySQL.
create database piwigo;
exit
Complete Piwigo Installation
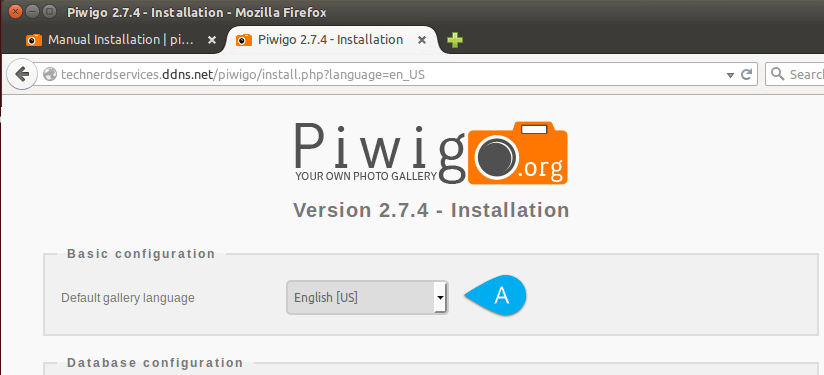
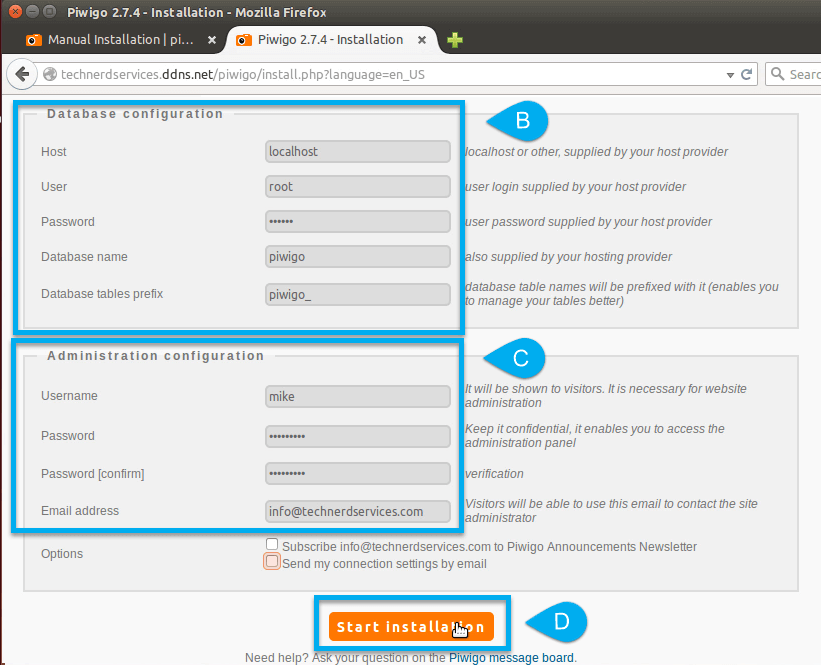
- In a web browser, navigate to your server. The default will be http://yourserveraddress/piwigo.
- Select the appropriate Language (A), complete the fields for the MySQL database (B), and create the first user (C). Once complete, click the orange “start installation” button (D).
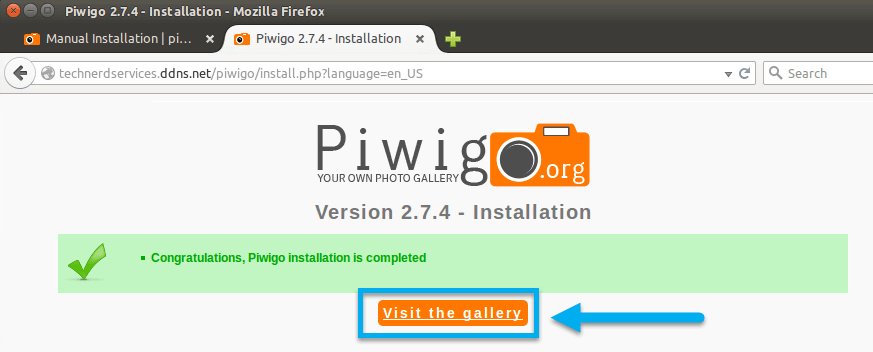
- The next screen will confirm the installation. Click the orange “Visit the gallery” button.
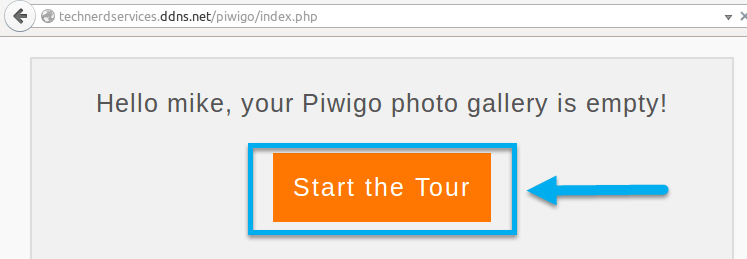
- The next screen will offer to launch a tour to familiarize yourself with Piwigo Photo Gallery. Click the orange “Start the Tour” button.
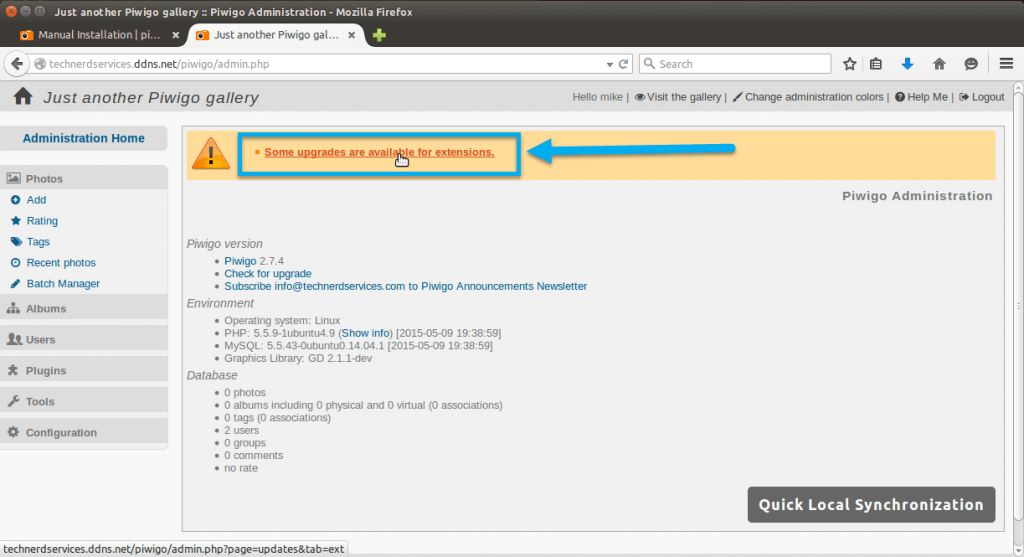
- Once the tour is complete, click on the “Administration” link in the left sidebar. There may be an orange warning banner stating that there are some additional upgrades to installed extensions. If so, click the “Some upgrades are available for extensions” link.
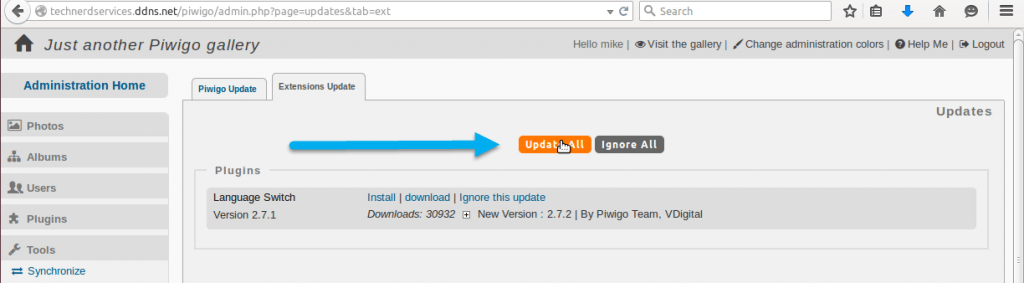
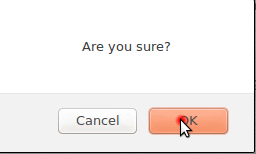
- Click the “Update All” button and then click “OK” in the popup.
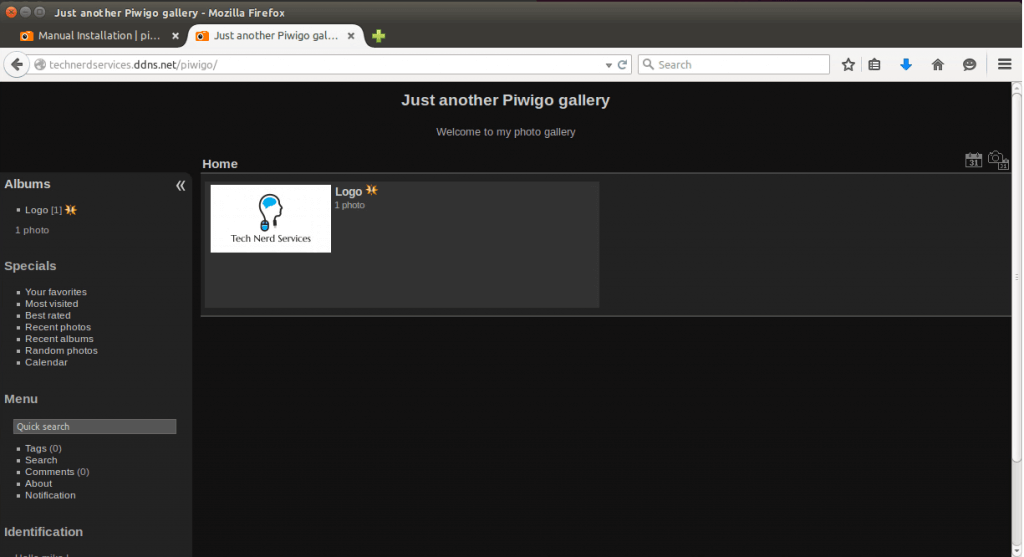
- Click the “Visit the Gallery” link in the header menu to view the photo gallery.
Final Words and What’s Next
Piwigo Photo Gallery’s simplicity allows for an easy to use online photo gallery alternative to services such as Facebook, Google+, Instagram or Tumblr. Not only do you exclusively control your photos, but you can choose who can and cannot see specific photos, allowing you to be in control with your data. While this concludes the home server series, new installations tutorials will continue. (The new series will most likely be called Home Server Extras). These tutorials will include web applications that may be similar to ones already installed to provide a variety of online tools your can install on your server. Til then, keep teching on.
Support Us!
Thank you for reading this article. If you found it useful, please consider buying us a coffee, subscribing to the YouTube Channel, and/or changing your Amazon bookmark to our affiliate link (CAN, USA, UK). We do this out of general interests and to help others. Thanks!


May 11, 2015 at 11:01 AM
Just got the e-mail on this one.
This is one big reason I do not want you folks to change your tutorial schedule, just to satisfy my own curiosities.
I would never have considered a personal Home server Image Gallery or its possibility, But I can instantly see many potential uses.
Thank you for the new discovery
and
Thank all of you for your time
Anxiously awaiting next instructional
May 11, 2015 at 12:05 PM
Thanks man,
It’s always great to hear that we are creating great tutorials. Ideas are always welcome. It’s how we learn about new awesome things too! I never thought of creating a bulletin board, but after hearing about it, I definitely want to explore it more too. So don’t hesitate in sending in suggestions.
Thanks for your support.
May 12, 2015 at 5:18 PM
Was going to comment at Youtube, but since conversation started here :p
Again: I never considered it, but the photo gallery (Piwigo) is an instant hit with friends and family. Several of whom are in the military overseas. They have already upload images to share with other friends and family, Using the ownCloud to remotely store personal information, Joomla (that I based my install on your Word Press Video) and are already considering the home services that you folks have helped me build to be better than Skype. As it is more reliable and instantly available…..especially for service family members that can only get to terminals only so often.
They now know they have a place to go, a place to leave their memories, and family contact away from unsafe areas.
They send their thanks and mine as well.
On to why I am here now:
We now have ownCloud, Word Press (in my case: Joomla), Piwigo, and in my case (again) PhPBB 3.1.x (as a private Family forum)
Now comes the question:
How to get a single log in for all???
As of now each program offering needs to be signed into individually.
A family member in Afghanistan was asking if there is a way to sign once to have access to all???
Again more stuff that I do not consider 😉
If heavily complicated, no worries….I will tell him this is the way it is until I get more tech savvy 😀
Thanks in advance for your time
May 12, 2015 at 5:32 PM
I’m glad that your home server is working well and connecting your family together.
About the single login. It’s formally called single sign-on (SSO) and is more complicated since you either need to setup Active Directory or an authentication server. Both are no easy tasks and definitely not something a 15 minute YouTube can accomplish. Sorry!
May 12, 2015 at 5:35 PM
No need for apology.
As I said, I will inform that will have ot wait.
But with the information you have just given….I will start that homework to learn how establish/create an SSO on my system.
Thanks again 😀
August 30, 2015 at 9:03 AM
I have a few doubts as I’m new to photo gallery software. I was searching for a tutorial on how to install some photo gallery software on my Ubuntu server and I found your tutorial. Also, I came across this article: https://www.rosehosting.com/blog/how-to-install-gallery3-on-an-ubuntu-14-04-lts-vps/
I’m still in doubt about which one should I use, Piwigo or Gallery3. Could someone please help me?