


Invoice Ninja is a free and open source invoicing software. Their site provides Invoice Ninja as SaaS (Software as a Service), but if you or your company is more security and privacy minded, it can be hosted on a private server. One major benefit of Invoice Ninja is it’s compatibility with over thirty payment gateways. Automation processes such as recurring invoices are also found within Invoice Ninja. Find out how to install Invoice Ninja on Ubuntu 14.04
Contents
Acknowledgements
Instructions and support for properly installing Invoice Ninja were not only provided by Invoice Ninja’s support team, other sites gave important lines of code in order to get Invoice Ninja running. Credits go towards Rosehosting’s Debian Install tutorial and Freedif’s Install tutorial. This tutorial consolidates some of their code as well as includes the video tutorial.
Prerequisites
This tutorial assumes an Ubuntu 14.04 Desktop edition server is setup. (Instructions will work with Ubuntu 14.04 Server). In addition, if Invoice Ninja will be accessible to an external network, a Web address is needed. If either of these are not setup, click on the necessary tutorials below and then return to this tutorial.
- How to Install Ubuntu 14.04 Desktop Edition
- How to Install a LAMP Web Server on Ubuntu 14.04
- How to Install No-IP client and create a Web address with Dynamic DNS (optional)
- How to Add SSL encryption to a LAMP Web server (optional)
Video Tutorial
Install Dependencies
We need to install additional php5 dependencies and the git and curl dependencies to retrieve needed files.
sudo apt-get install php5-gd php5-curl php5-mcrypt git curl
sudo php5enmod mcrypt
Install Composer
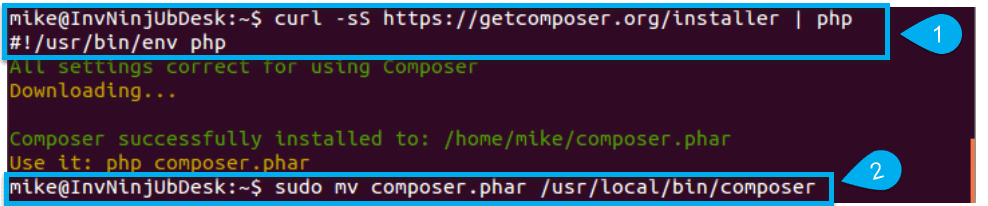
Composer will pull multiple dependencies from their respective repositories to build the Laravel framework that Invoice Ninja is built from.
curl -sS https://getcomposer.org/installer | php
sudo mv composer.phar /usr/local/bin/composer
Install Invoice Ninja
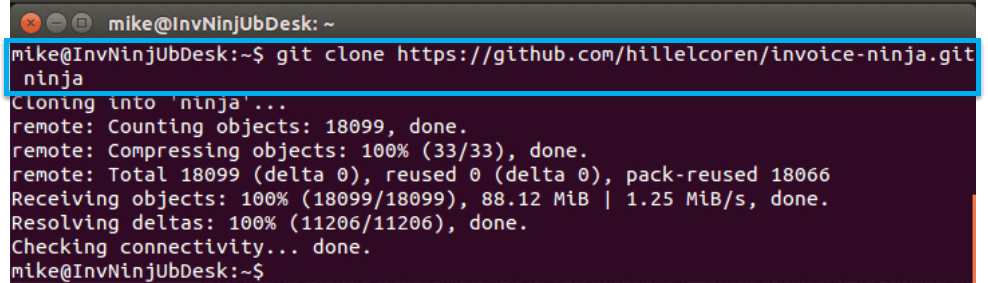
- Pull needed files from Github into the folder ‘ninja’
git clone https://github.com/hillelcoren/invoice-ninja.git ninja
- Move the ninja folder to the web server directory. Then change directory to the ninja folder.
sudo mv ninja /var/www/
cd /var/www/ninja
- Use composer to install framework
sudo composer install
NOTE: During the composer install, the screen will look like the following:
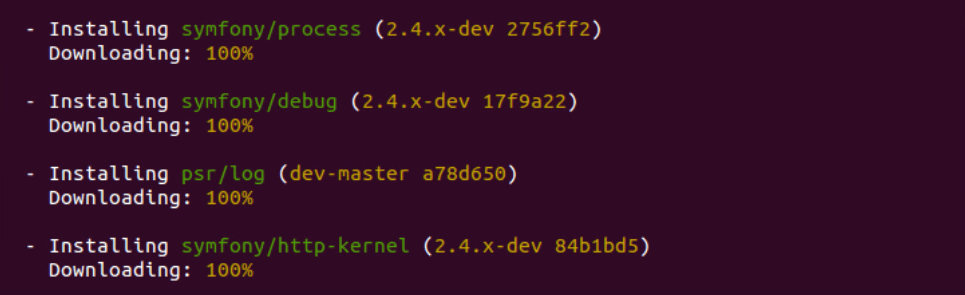 NOTE: Part way through the composer install, the public download limit of Github will be reached. Composer will as for login credentials to continue. Simply create an account at Github to continue.

- Update Composer and re-install packages
sudo composer update
sudo composer install
Create MySQL Database
- Log into MySQL as root
mysql -u root -p
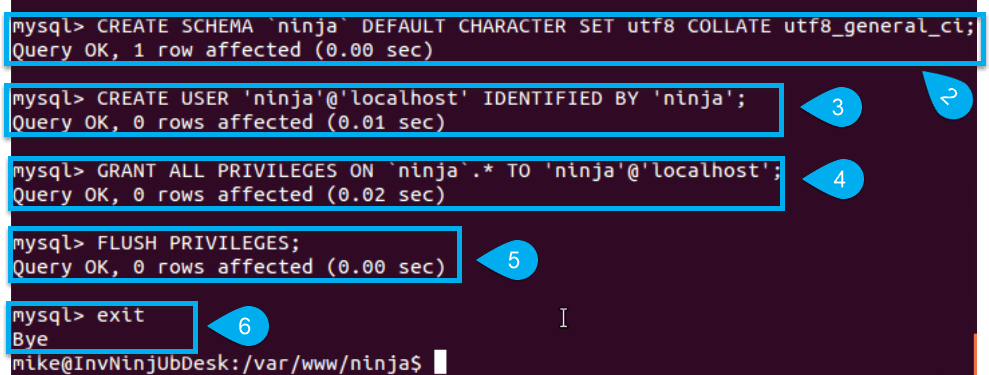
- Create the database
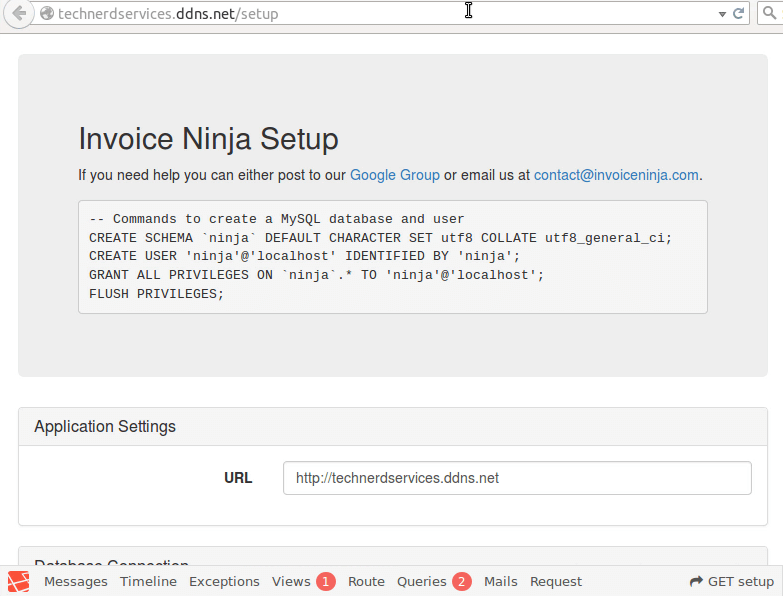
CREATE SCHEMA `ninja` DEFAULT CHARACTER SET utf8 COLLATE utf8_general_ci;
NOTE: To increase security, change the database name from the default ‘ninja.’
- Create the MySQL user and password
CREATE USER 'ninja'@'localhost' IDENTIFIED BY 'ninja';
NOTE: To increase security of your Invoice Ninja app, change the user and password above. (The user is the first ‘ninja’ and the password is the second ‘ninja’).
- Grant privileges of the new database to the new user
GRANT ALL PRIVILEGES ON `ninja`.* TO 'ninja'@'localhost';
NOTE: If you made any changes to the username or database name above, make those changes to this command. (The first ‘ninja’ is the database and the second ‘ninja’ is the username).
- Flush the database privileges
FLUSH PRIVILEGES;
- Exit MySQL
exit
Configure Apache Web Server
- Open the default sites configuration file
sudo nano /etc/apache2/sites-available/000-default.conf
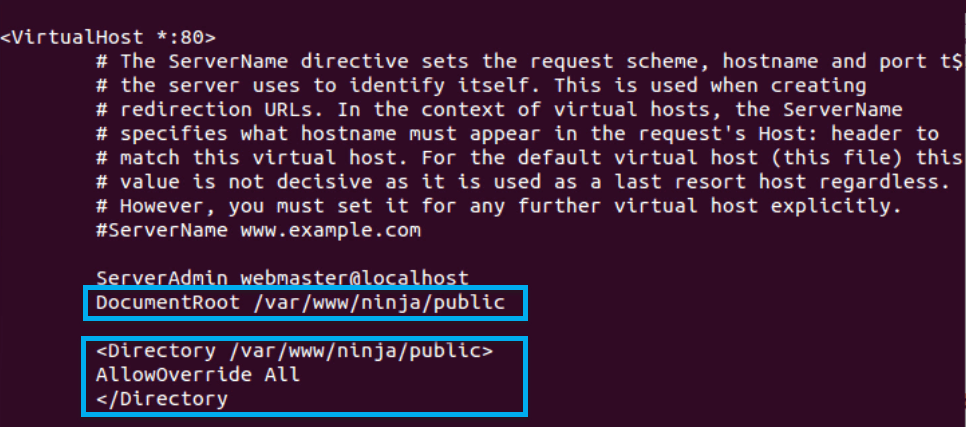
- Change the DocumentRoot line to the ‘public’ sub-folder of the ninja folder. Then add a directory rewrite for the folder
DocumentRoot /var/www/ninja/public

<Directory /var/www/ninja/public>
AllowOverride All
</Directory>
- Enable the rewrite apache mod
sudo a2enmod rewrite
sudo service apache2 restart
Invoice Ninja Web Setup
- Enable the production environment for Invoice Ninja
sudo cp bootstrap/environment.default.php bootstrap/environment.php
- Change ownership of the ninja folder to the web server.
sudo chown www-data:www-data -R /var/www/ninja
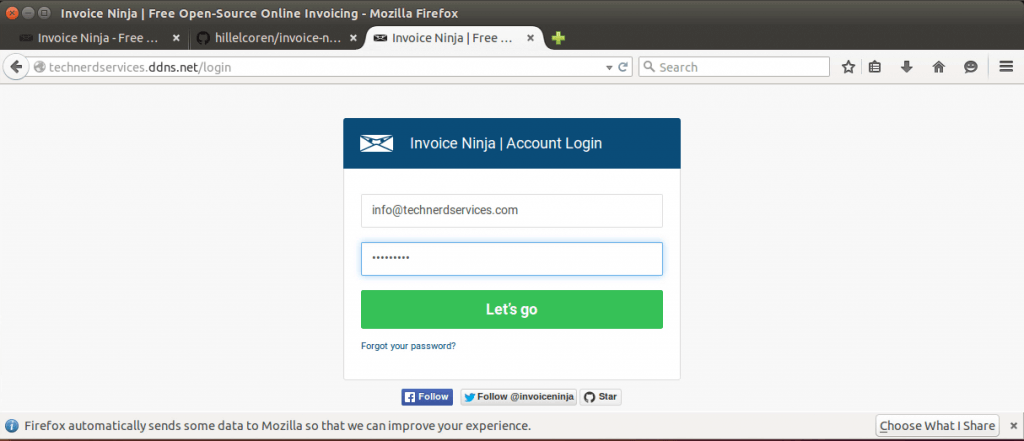
- Open a web browser and navigate to the web server
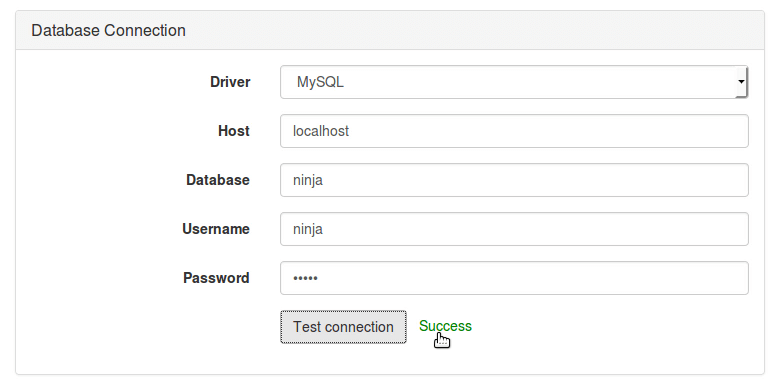
- Update database information if necessary. Test the connection to ensure correct information
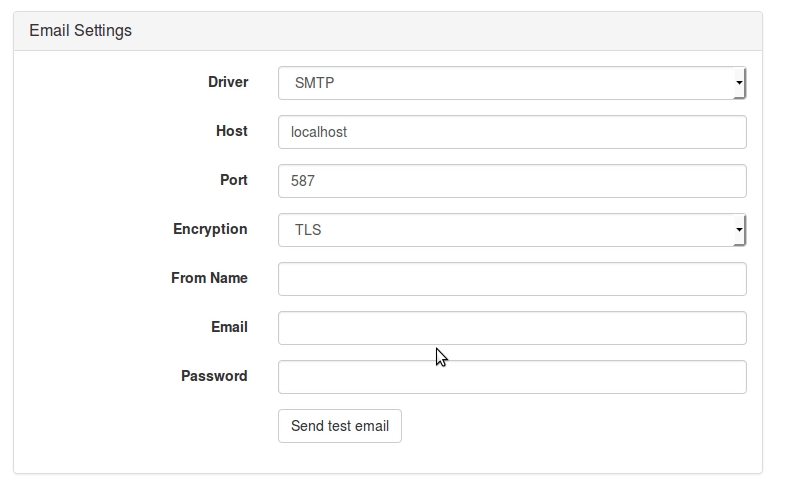
- Input SMTP email server information. Send a test email.
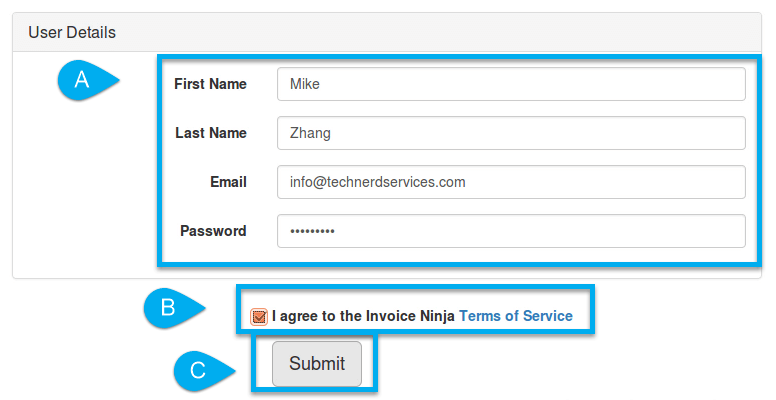
- Create the administrative user information (A). Accept the Terms of Services (B) and click the Submit button (C).
Congratulations! Invoice Ninja is installed on operational!
Support Us!
Thank you for reading this article. If you found it useful, please consider buying us a coffee, subscribing to the YouTube Channel, and/or changing your Amazon bookmark to our affiliate link (CAN, USA, UK). We do this out of general interests and to help others. Thanks!


Leave a Reply