


Subsonic is a Music and Video Streaming Server similar to Plex (install tutorial here) and Kodi. Whether you use it as an alternative to Plex or in conjunction, read on to learn how to install Subsonic Media Server on Ubuntu Desktop 14.04. In my home setup, I prefer to use Subsonic for music streaming, Plex for video streaming, and Piwigo (install tutorial here) for photo galleries. Therefore, each type of media can be separated and controlled with different user access.
The main reason for Subsonic being a music streaming server is that it recently changed from a one time donation to subscription model, removing video streaming from its free version. While its subscription is a low $1/month, because Plex already excels at streaming video, losing that function is not problematic. Furthermore, I never used it with any mobile apps to conserve mobile data. However, if these features are important, consider subscribing to Subsonic’s premium features when the trial expires.
Video Tutorial
Written Instructions
Download the Installation Package
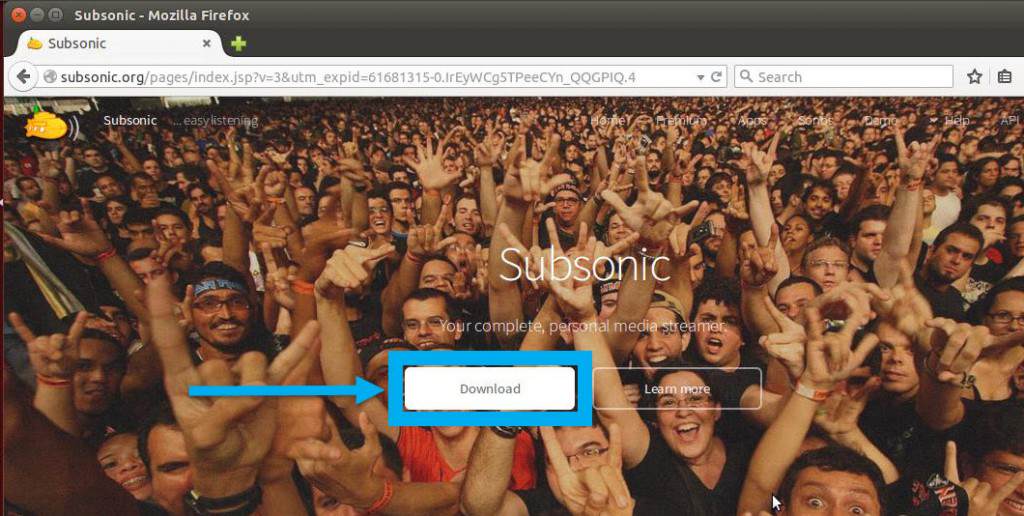
- Open a web browser (i.e Firefox) and navigate to subsonic.org
- Click on the “Download” button on the center of the page.
- Click on the file version beside the “Debian/Ubuntu” option.
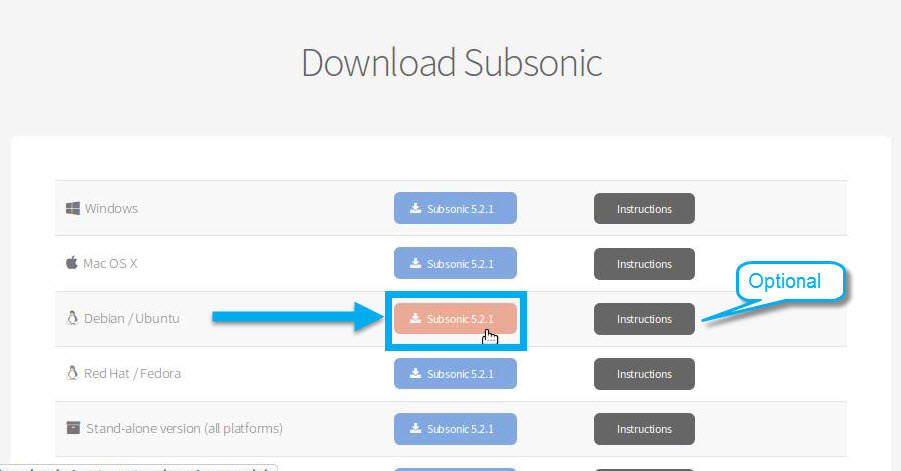 NOTE: You can optionally click on the Instructions button to view Subsonic’s installation instructions. Their instructions are more geared towards server installations.
 - Save the file by clicking the “Save” button in the popup.
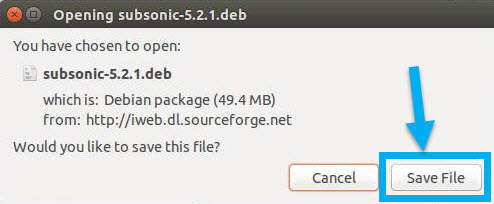 Note: You should be saving a “deb” file.

Install the Java Development Kit
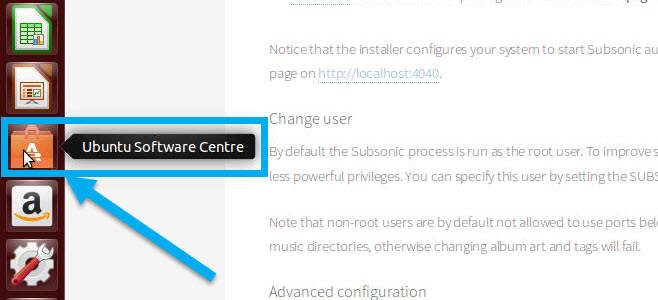
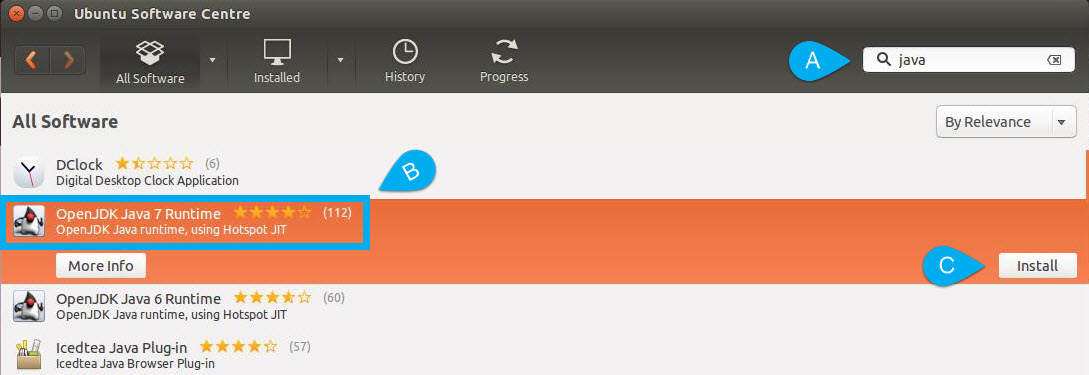
- Open Ubuntu Software Centre.
- In the search bar, type “java” (A). The single click on “OpenJDK Java 7 Runtime” software (B). Finally, click on the “Install” button (C).

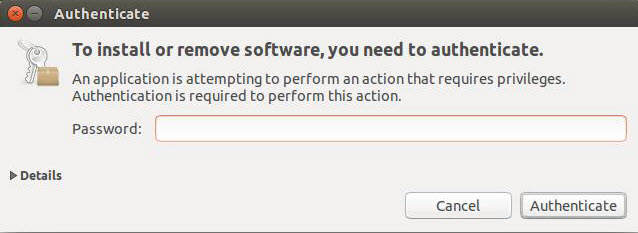
- Enter your password in the administrator pop up.
Install Subsonic Media Server
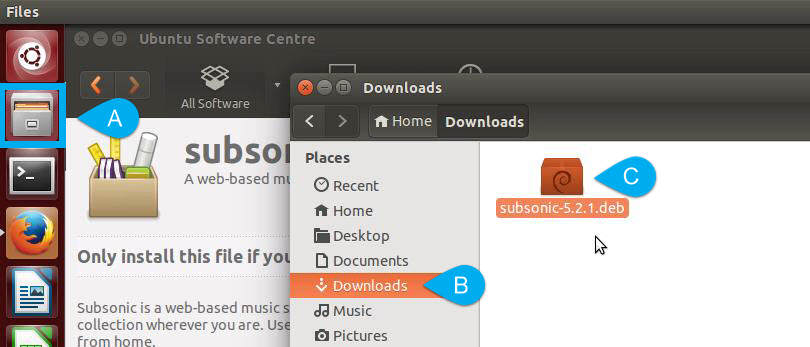
- Open the file explorer (A). Then click on “Downloads” in the sidebar (B). Finally, double-click on the subsonic file (C).
- If Ubuntu Software Centre is still open, bring it to the front, else it will automatically re-open. It will show information about the Subsonic package. Click the “Install” button on the right.
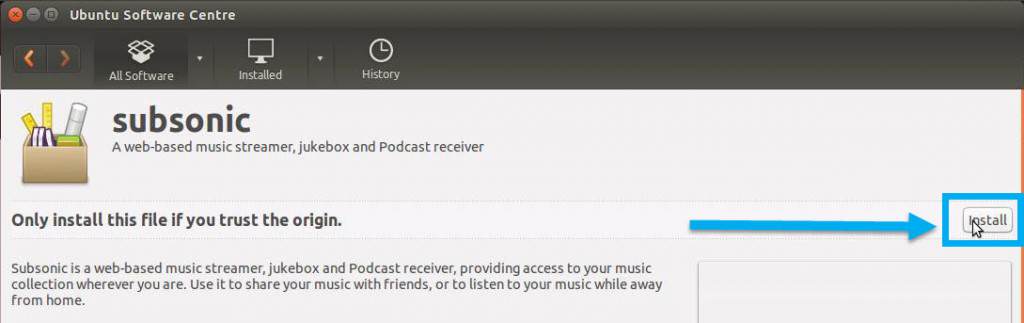
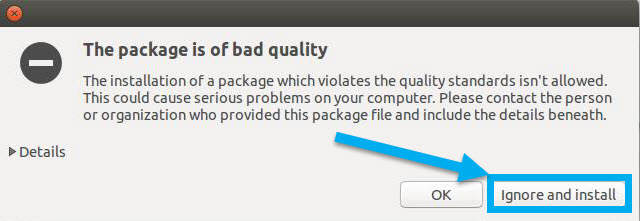
- A pop up may appear warning against a corrupt file. This appears because packages from Ubuntu’s restricted extras are part of this installation. If those extras are enabled the pop up will occur. Simply click the “Ignore and install” button to continue.

Complete Setup in Web Interface
Open a web browser and navigate to your computer’s port 4040. If you have not setup a web address, simply type \\localhost:4040 in the address bar, or check out this tutorial to create a web address; else, type in the web address of the computer and add “:4040” to the end (without quotation marks).
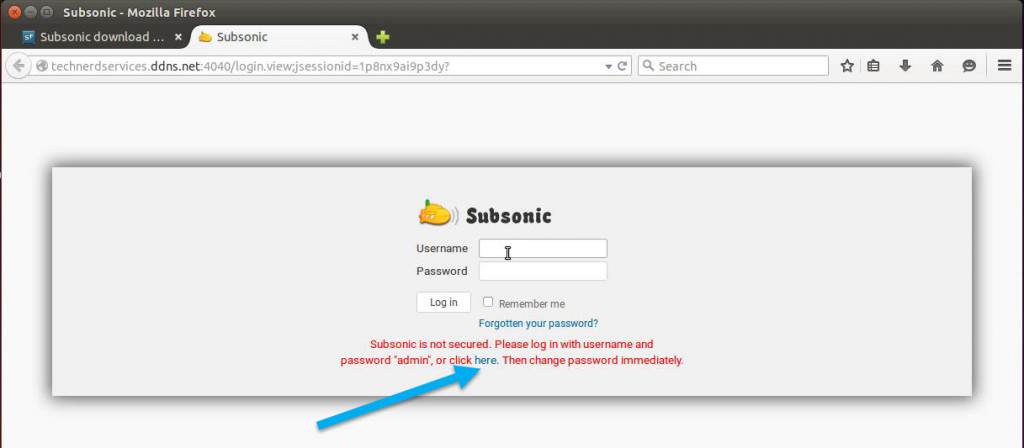
Create a Password for the Administrator account
- Click on the “here” link below the login fields.
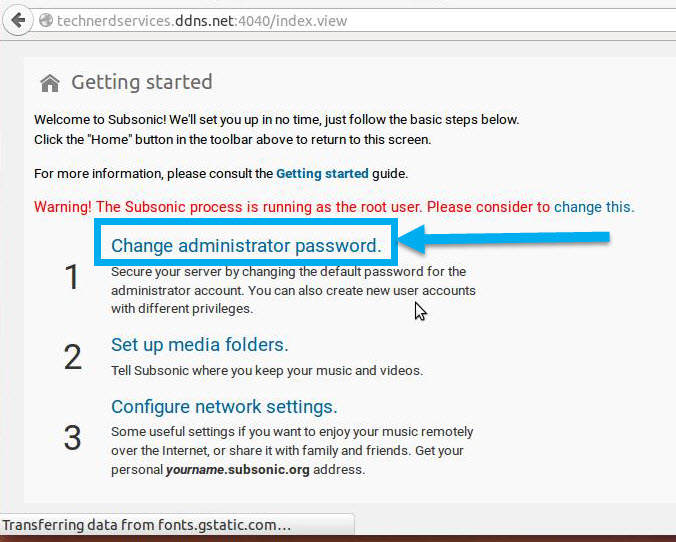
- Click on the “Change administrator password” link.
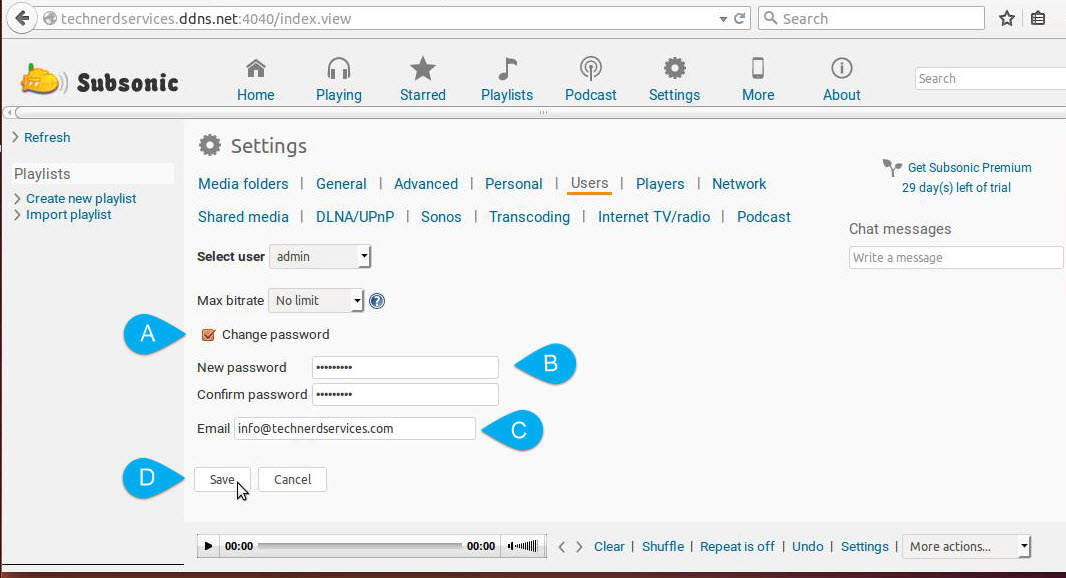
- Click on the “Change password” check box (A). Then fill in the “New password” and “Confirm password” fields (B). Optionally, you can add an email address under the “Email” field (C). If you forget your password and the server is setup with an SMTP server to send emails, you can receive a email to reset your password. Finally, click the “Save” button when complete (D).


Once the administrator user password is created, Subsonic will reload to the login page. Type in “admin” in the “Username” field and the created password in the “Password” field. Then click the “Login” button. 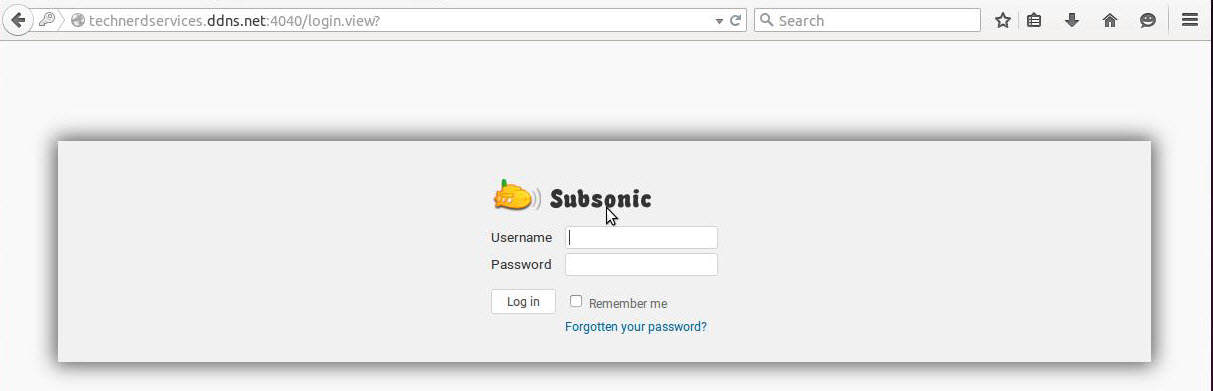
Add Media Folder to Subsonic
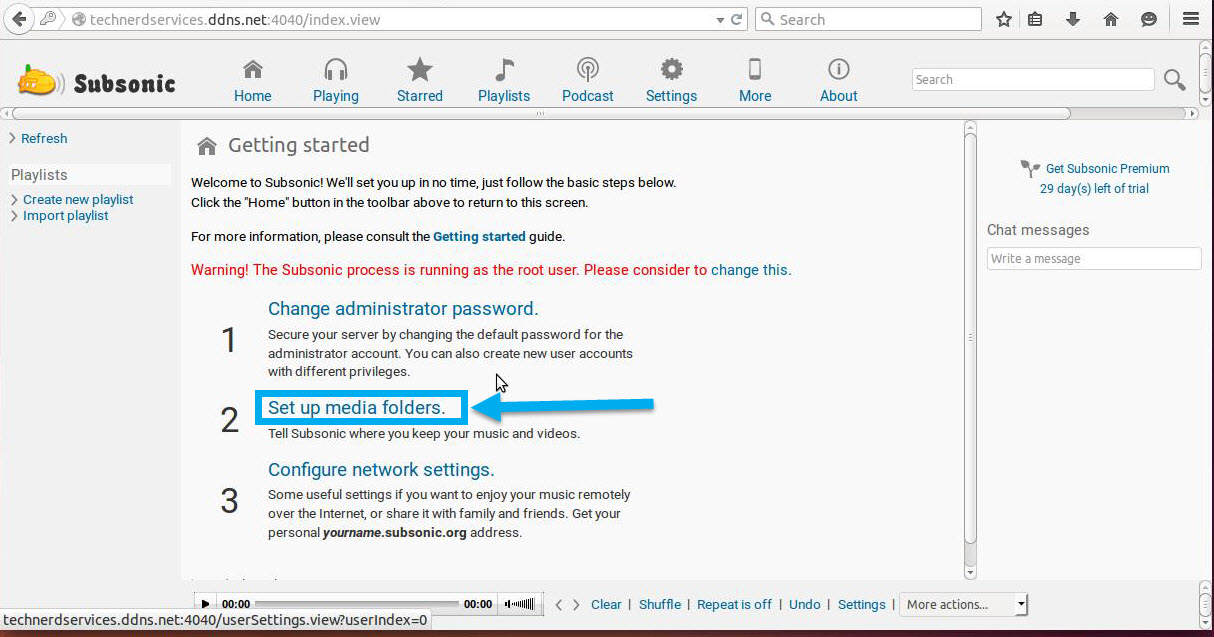
Once you have logged into Subsonic, there will be a “Getting started” page. If it does not appear, click on “Settings” in the menu.
- Click on the “Set up media folders” link.

- Under “Add media folder” header, name the folder location (A) and type in the exact folder location on the computer (B). You may need to reference the file explorer to determine the media folders exact location. Most likely it will be something similar to “/home/user/Music.” Click the “Save” button when complete (C).
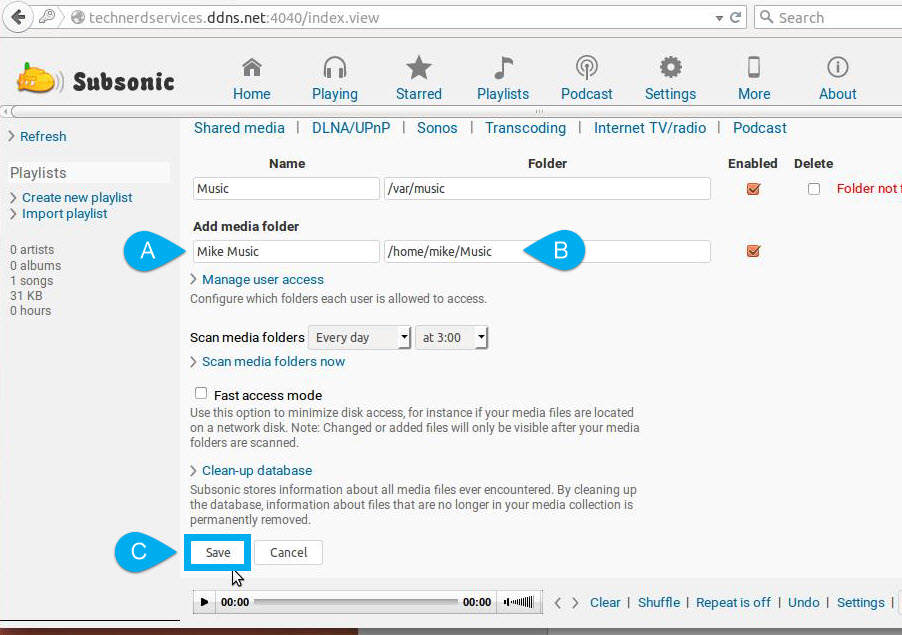
Once the folders have been added, by clicking “Home” in the menu, the albums within the media folder will be visible. 
Configure Network Settings.
This section is optional since it primarily includes settings for the Premium Subsonic service. To access your media outside of your home with a computer or mobile device, port forwarding must be set up on the router. An example set of instructions can be found here. An alternative to using Subsonic’s web address to access your media is to set up your own public web address. a tutorial is found here.
Final Words
With services such as Spotify, creating a personal music streamer may seem redundant. However, if you already have a large library of music or want extra control over where your media comes from, Subsonic is a simple and easy to install web application to manage your music at home and on the go.
Support Us!
Thank you for reading this article. If you found it useful, please consider buying us a coffee, subscribing to the YouTube Channel, and/or changing your Amazon bookmark to our affiliate link (CAN, USA, UK). We do this out of general interests and to help others. Thanks!


Leave a Reply