


Moodle is an open source online learning management system. It is flexible and offers many teaching and training tools through its large plugin directory and compatibility with other web applications such as Google Apps and SCORM. Learn how to setup Moodle 2.9 on an Ubuntu 14.04 desktop.
Contents
Prerequisites
The following tutorial assumes that a computer with Ubuntu 14.04 installed. Another optional component is assigning a web address.
Video Tutorial
Install Apache Web Server
- Open Terminal and install tasksel with the following command:
sudo apt-get install tasksel

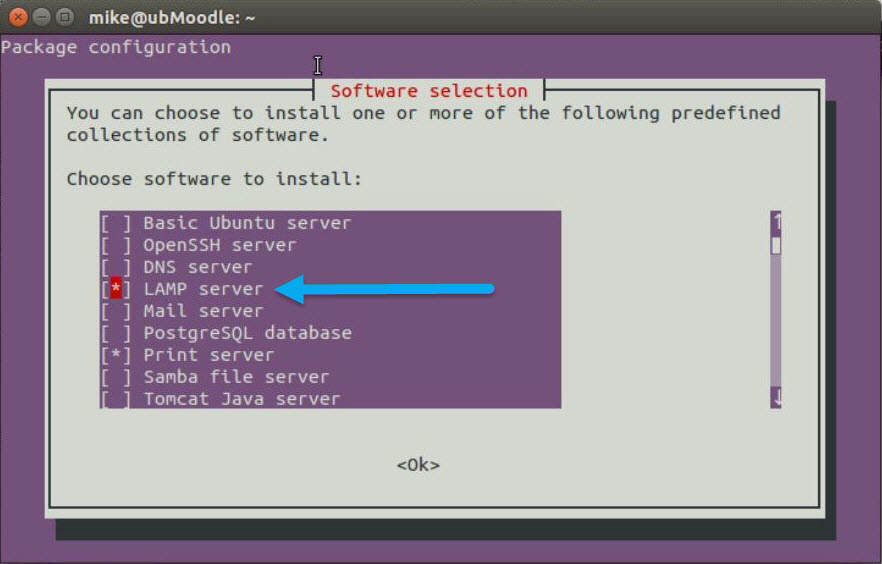
- Once tasksel is installed, run tasksel
sudo tasksel
tasksel will display a menu. Use the arrow keys to navigate to “LAMP server”, hit the “spacebar” key to select the option and the “Enter” key to confirm the installation.
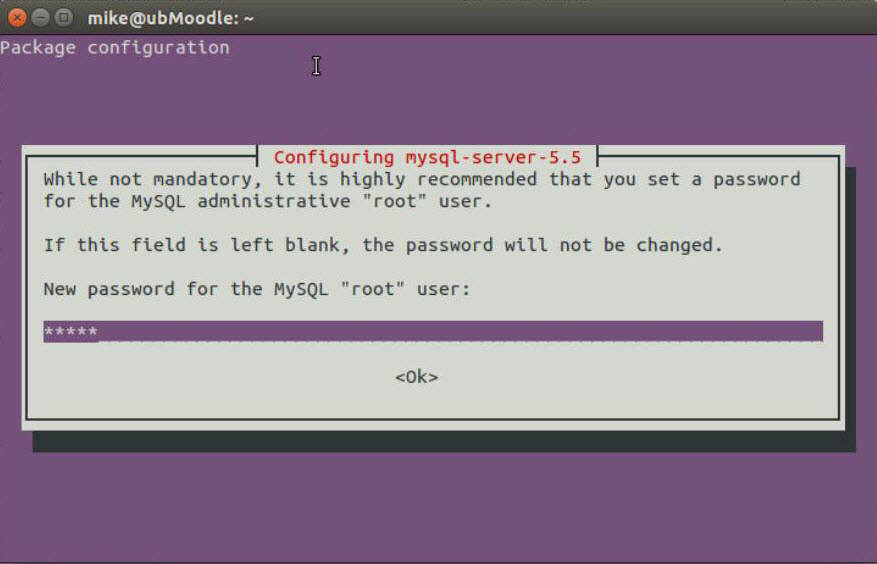
 During the install, the installer will prompt for a password for mySQL.
Install Moodle
Download the Moodle Files
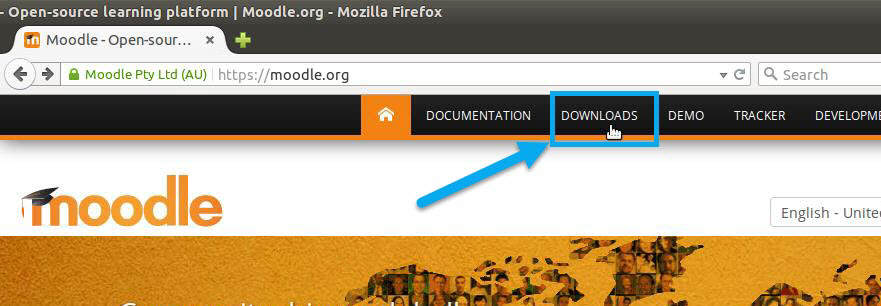
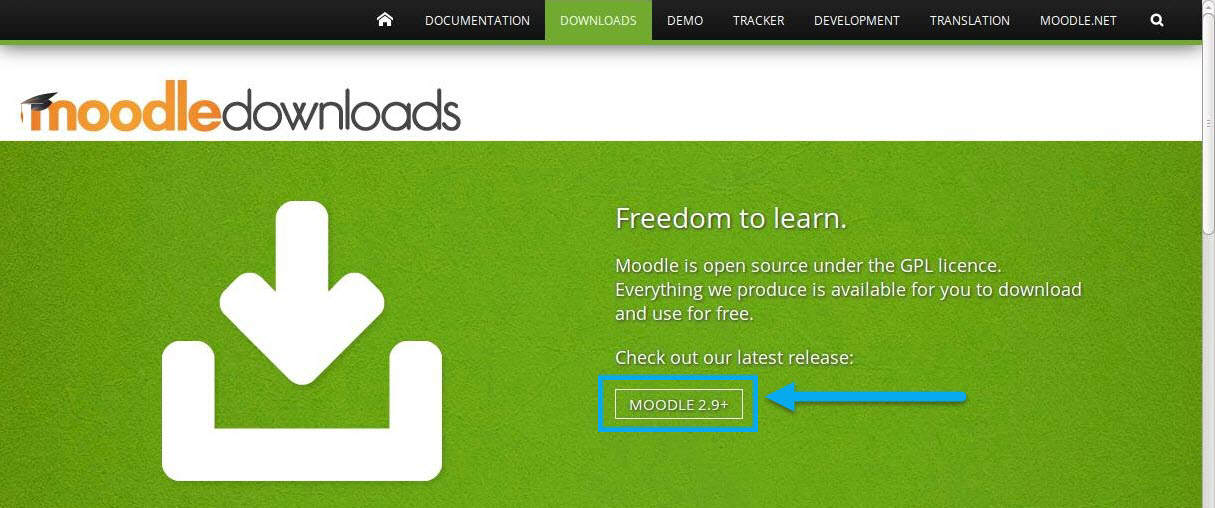
- Open and web browser and navigate to Moodle (moodle.org) and click on the “Dowload” link in the menu.
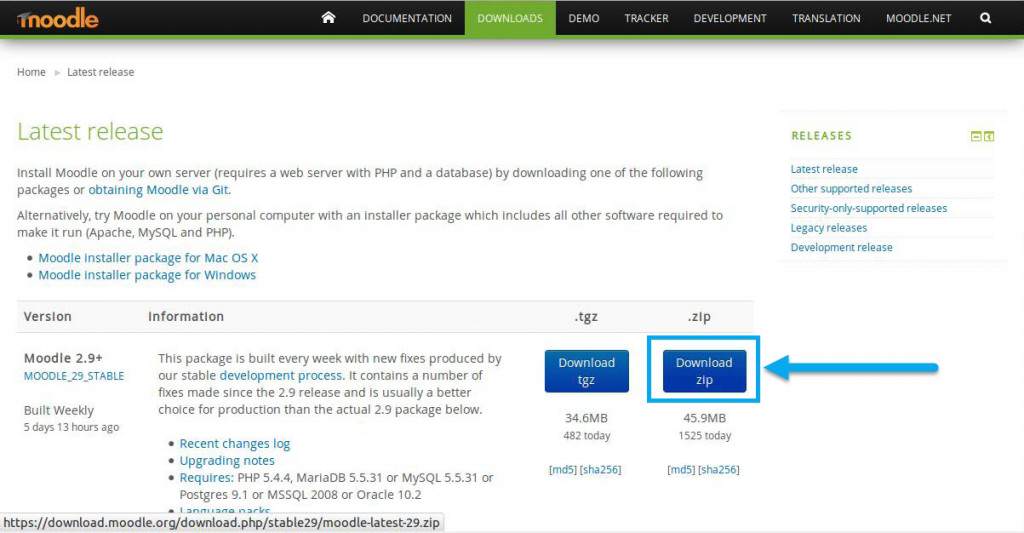
- Then click on the “Moodle 2.9+” button.

- Scroll down and click on the “Download zip” button.
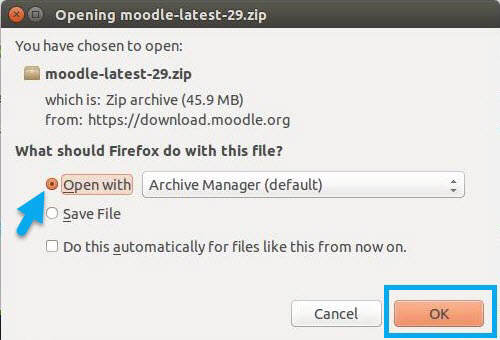
- In the popup, choose the “Open with” option to open the zip file in Archive Manager and then click the “OK” button.
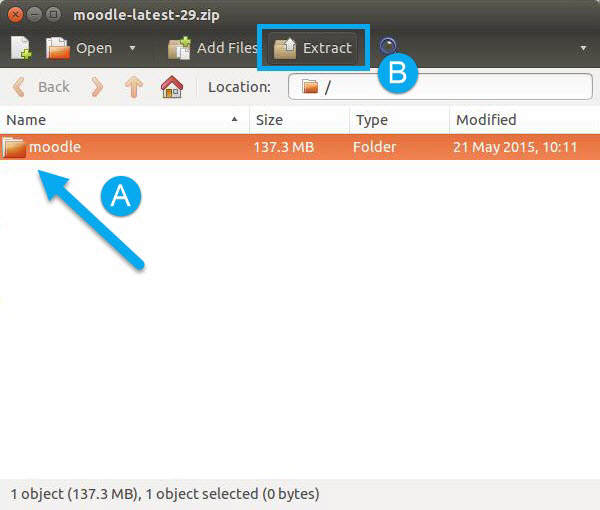
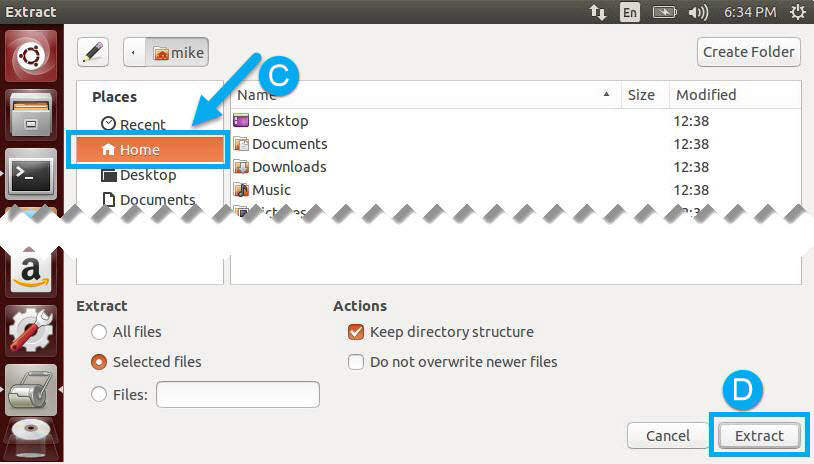
- When the Archive Manager opens, click on the “moodle” folder (A) and click on the “Extract” button in the menu (B). Select “home” as the download location (C) and click the “Extract” button (D).

Install Moodle files onto the Web Server
These instructions follow the instructions found on the Moodle website when “How to install Moodle” link is clicked after downloading the moodle zip file.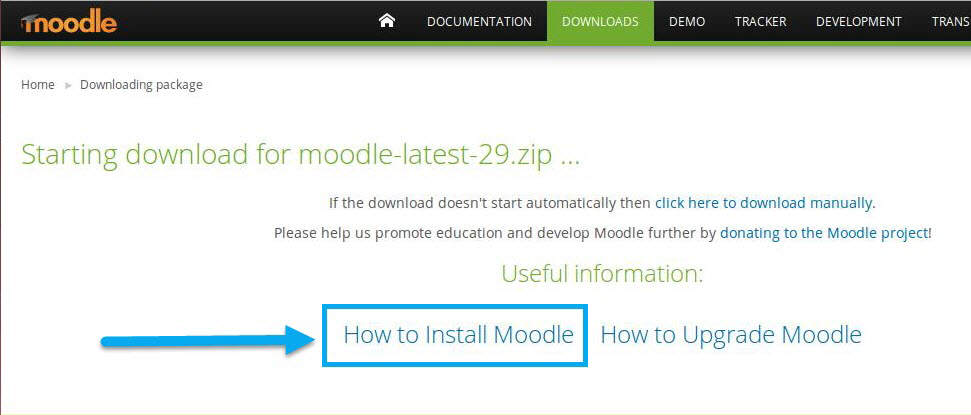
- In Terminal, move the moodle folder to the web server.
sudo mv moodle /var/www/html/
- Change owner permissions of the moodle folder to root. Note that we need to change the file path to the correct path in our webserver.
sudo chown -R root /var/www/moodle
sudo chmod -R 0755 /var/www/moodle
sudo find /var/www/moodle -type f -exec chmod 0644 {} \;

Create a mySQL Database
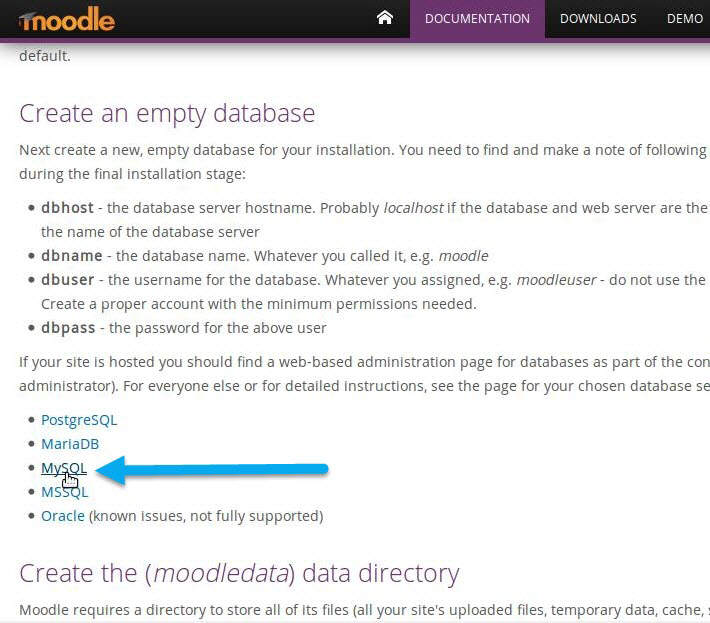
In the installation instructions, there is a link that opens another page with the mySQL instructions.
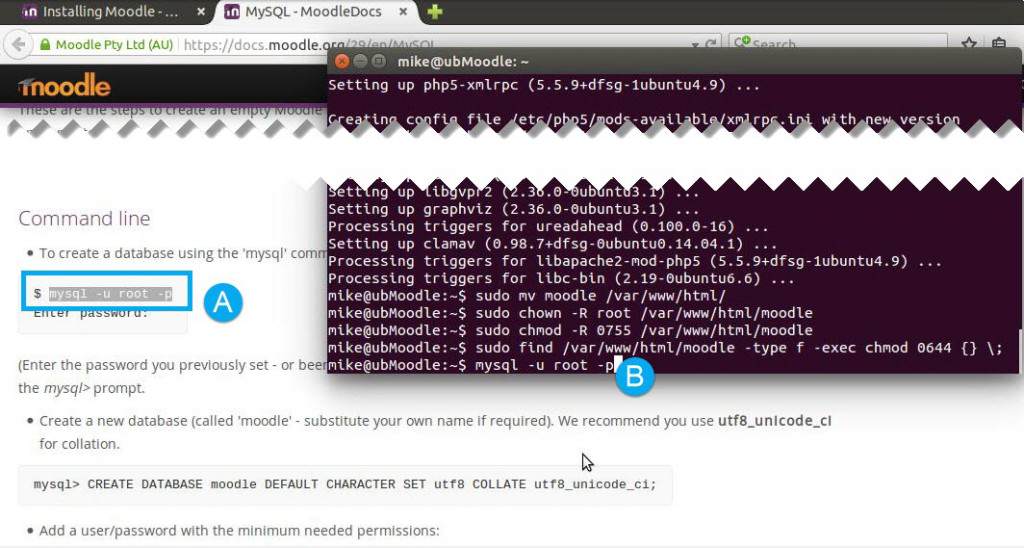
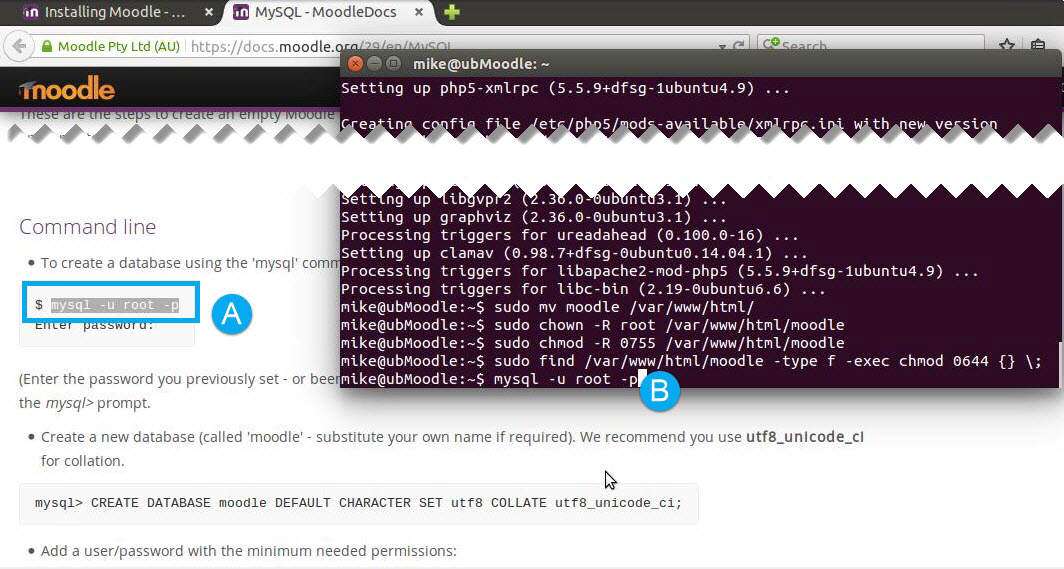
- Copy the login command from the webpage (or below) (A) and paste it into Terminal (B). Use the password created in the LAMP web server setup to login.
mysql -u root -p
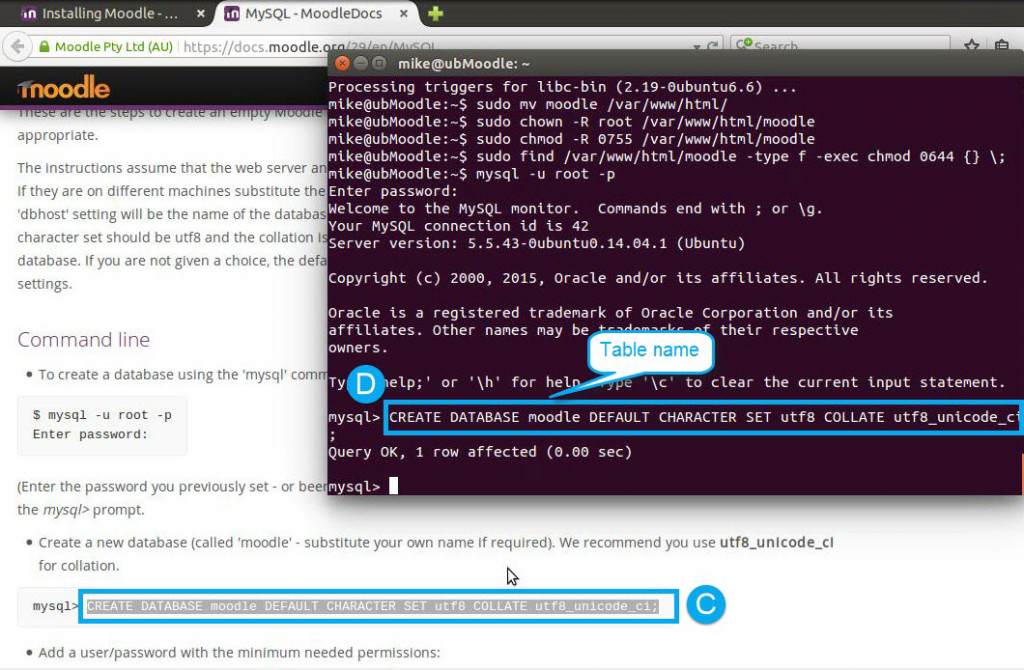
- Create the database by copying the command below or from the moodle website (C) and pasting it into Terminal (D). NOTE: the lower case “moodle” is the name of the database. If you are concerned about security, change this database to a new name.
CREATE DATABASE moodle DEFAULT CHARACTER SET utf8 COLLATE utf8_unicode_ci;
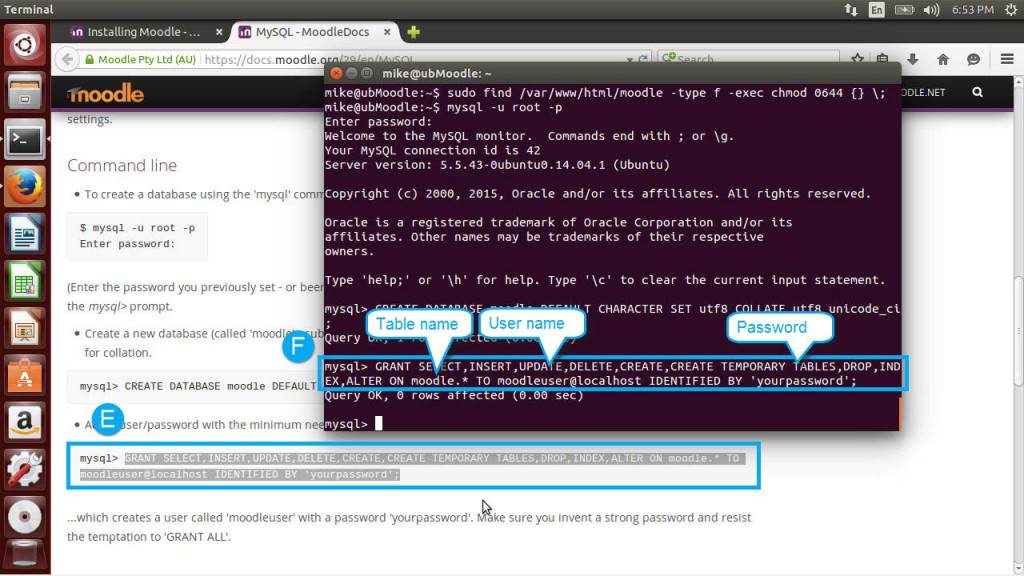
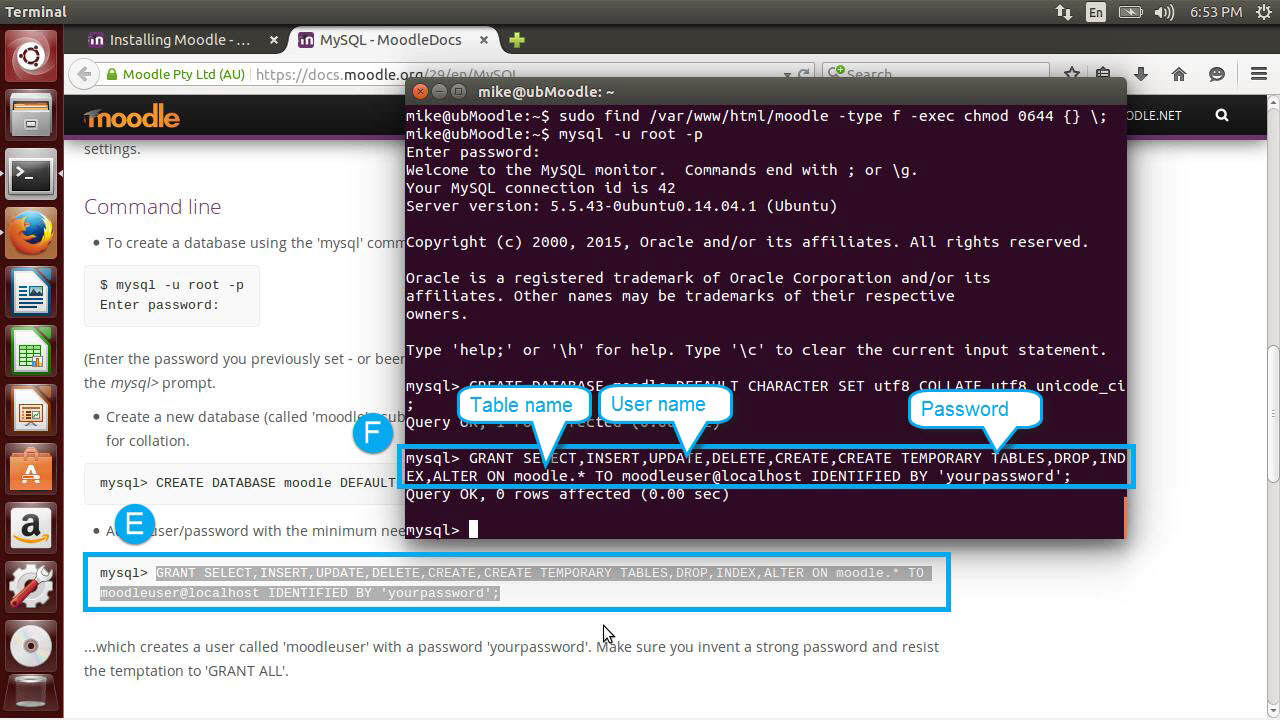
- Copy the next command below or on the moodle website (E) and paste it into Termainal (F). change the default user “moodeuser” and password “yourpassword” to new values for increased security. Also, if you changed the database name in the previous step, change it here.
GRANT SELECT,INSERT,UPDATE,DELETE,CREATE,CREATE TEMPORARY TABLES,DROP,INDEX,ALTER ON moodle.* TO moodleuser@localhost IDENTIFIED BY 'yourpassword';
- Quit the mySQL shell by typing in the command below.
exit

Create the Moodle Data Directory
The Moodle data directory is where Moodle will store its files. For increased security, Moodle strongly recommends to have this folder outside the web server.
- Create the Moodle Data directory
sudo mkdir /var/moodledata
- Change permissions of the directory to be accessible by the webserver.
sudo chmod 0777 -R /var/moodledata

Complete Moodle Installation in Web Browser
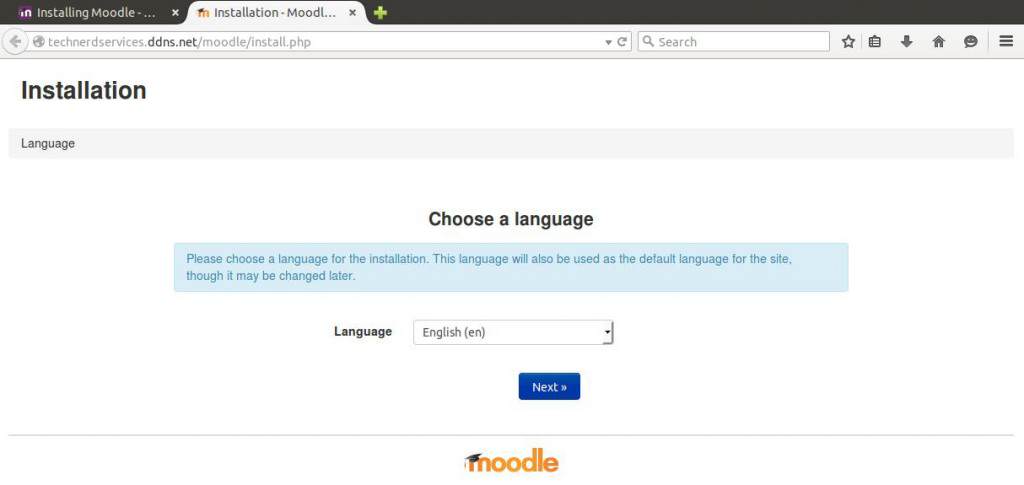
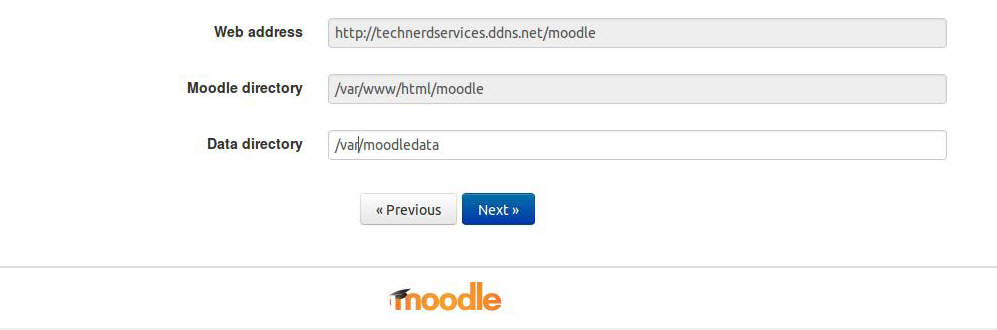
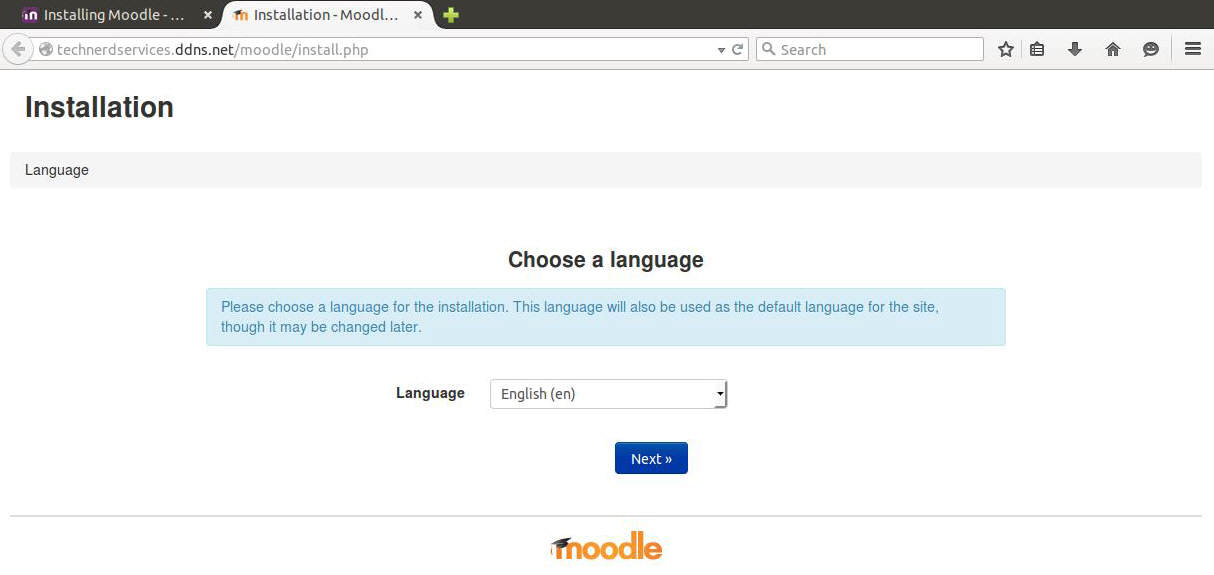
- Open a web browser and navigate to your server. Append “/moodle” onto the end of your server address (i.e. technerdservices.ddns.net/moodle).
- Select the appropriate language and click the “Next” button.
- Fill in the appropriate directory paths. Change the moodle data directory to “/var/moodledata”
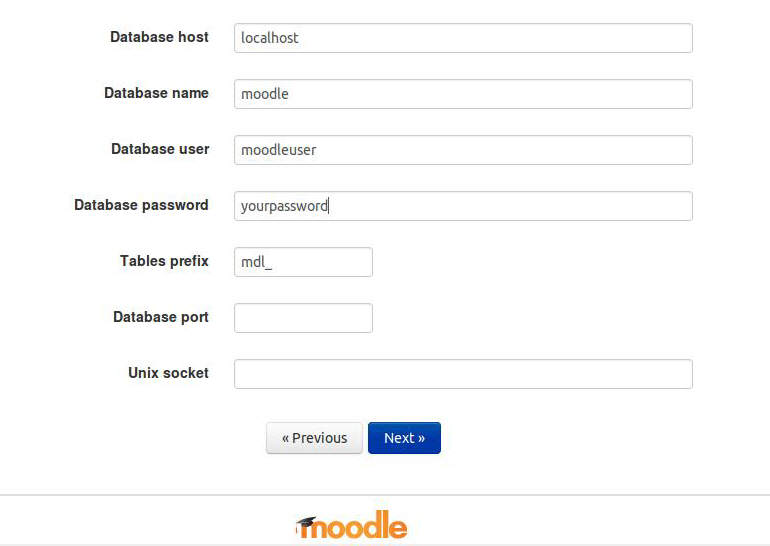
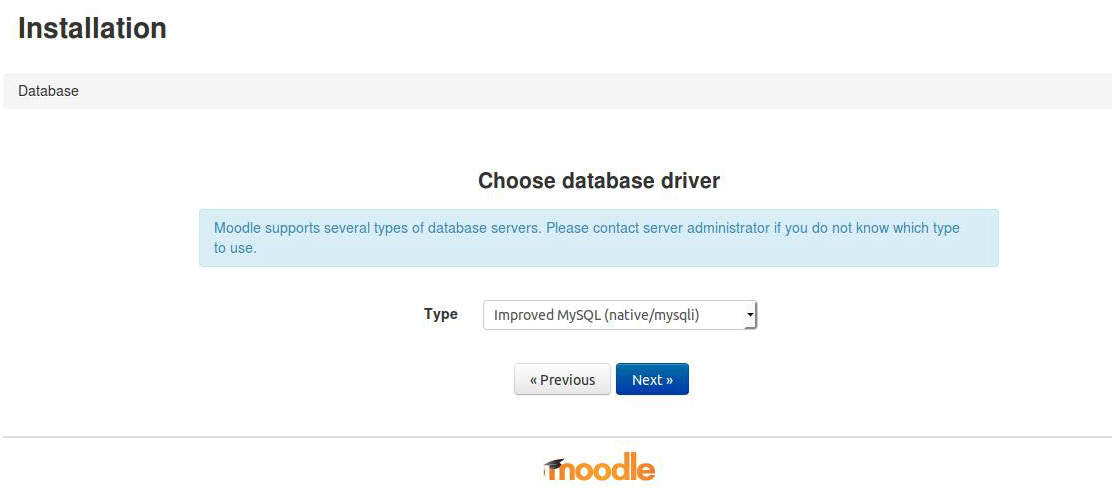
- The next page prompts for the database type. Use the default “MySQL” and click the “Next” button.

- Enter the appropriate database information created in the Create Database section. The other fields can remain their defaults.
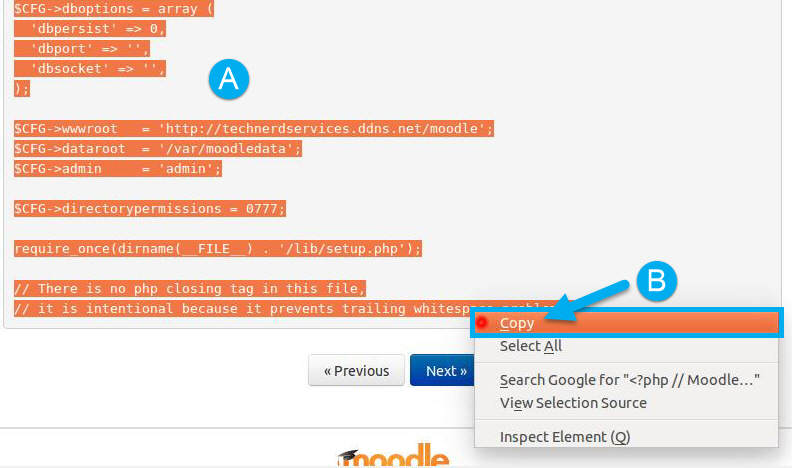
- The next page will display a write error because of the high security of this setup. Highlight all the text within the textbox (A) and copy the highlighted text (B).
- In Terminal, create the Moodle configuration file.
sudo nano /var/www/html/moodle/config.php
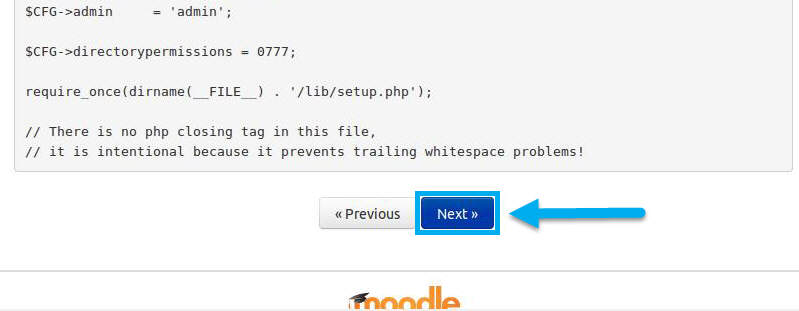
- Paste the copied text into the file.
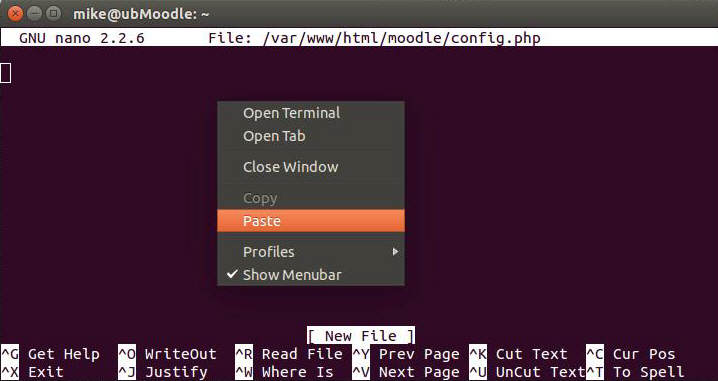
- Save the file using “CTRL + O” and exit the editor with “CTRL + X”
- In the web browser,click the “Next” button below the text box.
- If you receive this error

go back to Terminal and restart the webserver with the following command.sudo service apache2 restart
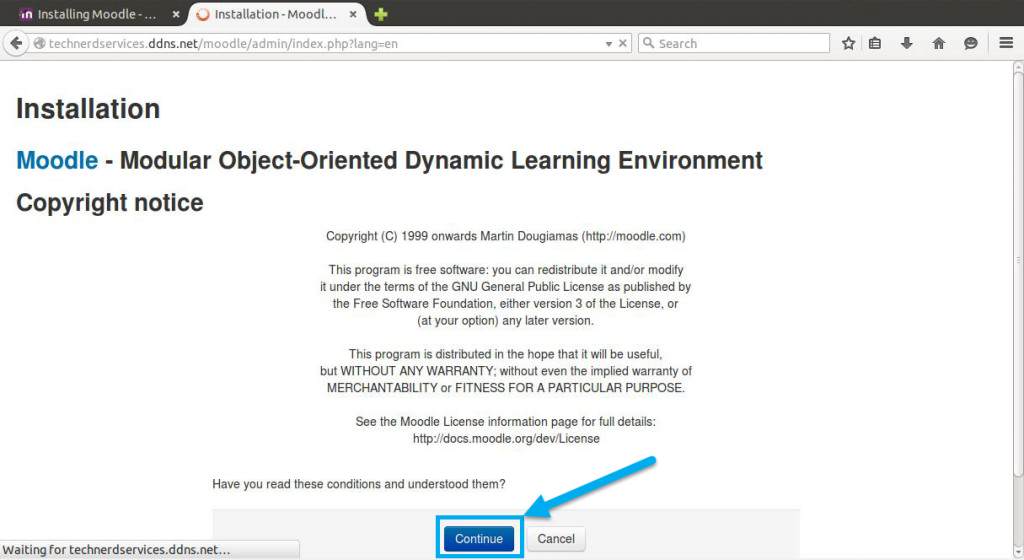
- Click on the “Continue” button at the bottom of the page.
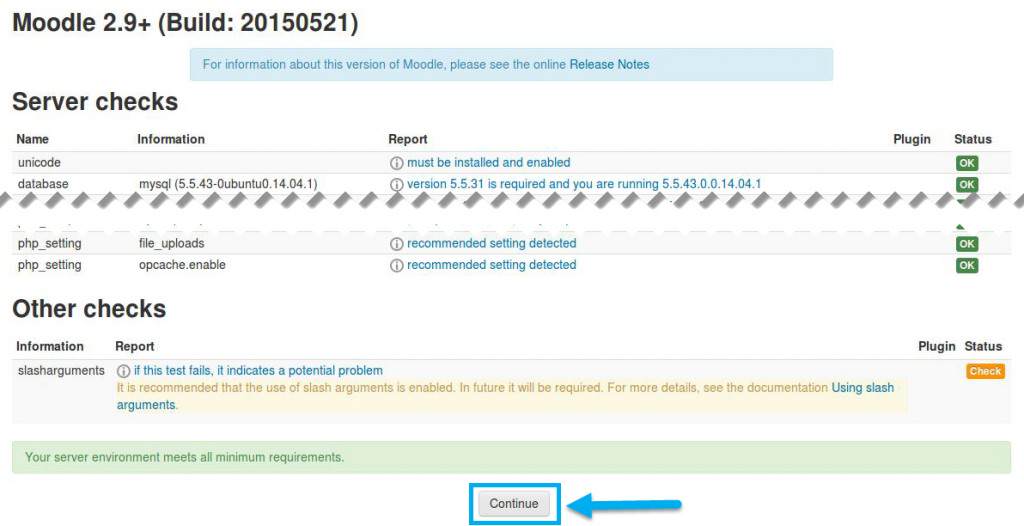
- Moodle will perform a server check to ensure that all required dependencies are installed. All should have a green “OK” on the right column. There may be a yellow “CHECK” for slasharguments. This can be added to the webserver, but is not mandatory in this version (but will be in Version 3). Click the “Continue” button at the bottom of the page.
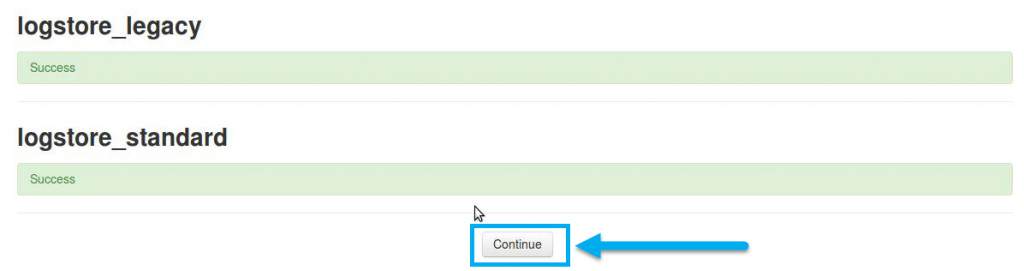
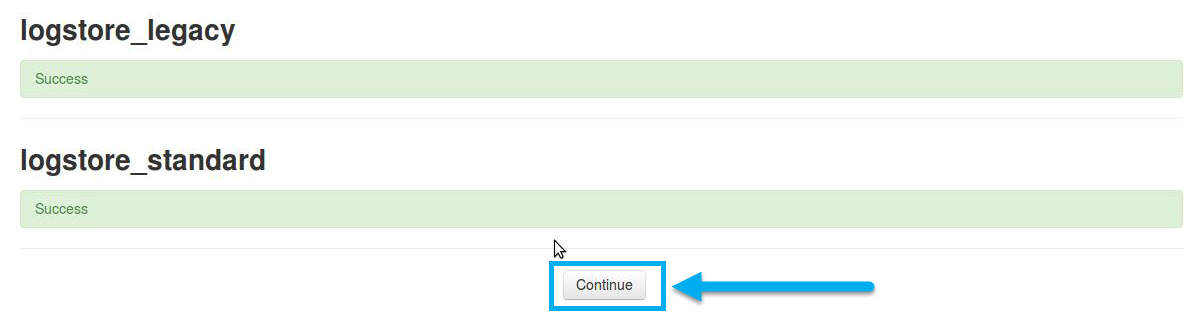
- The next page will create all the entries in the database. It may take a while, but when complete, the page will automatically school to the bottom. Click the “Continue” button.
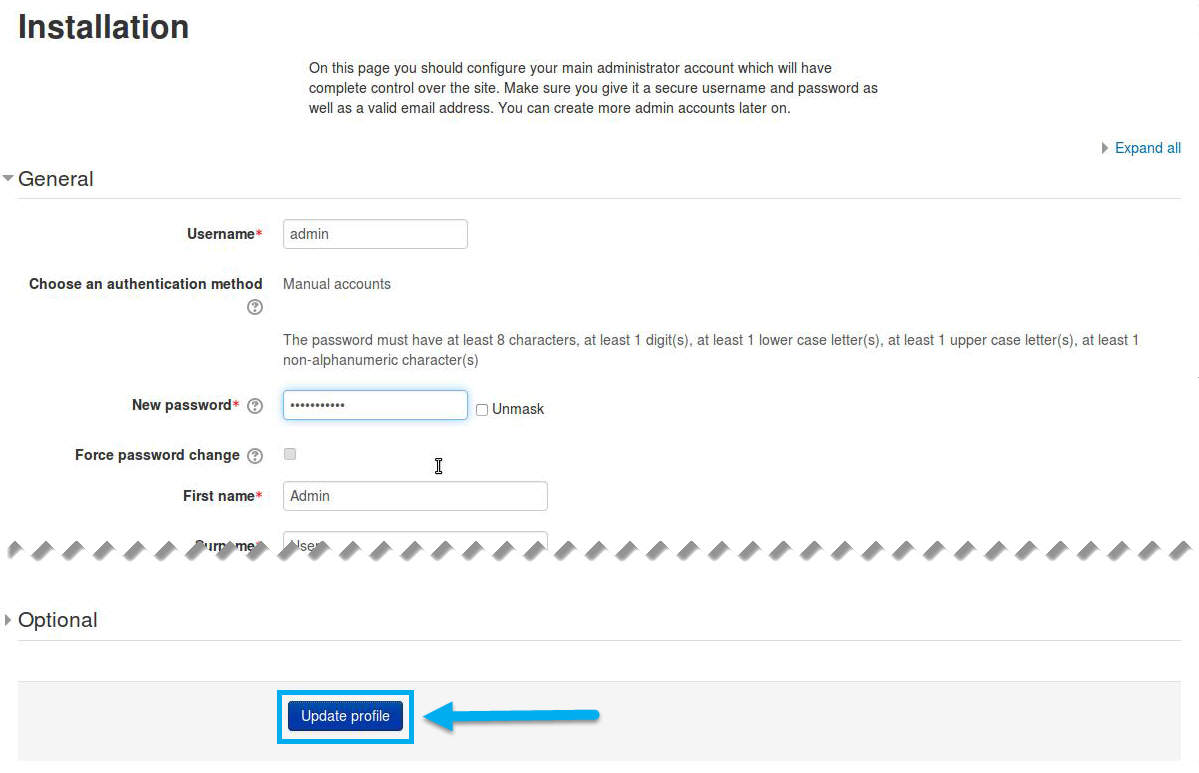
- Setup the first user. This will be the administor of Moodle. Click the “Update profile” when complete.

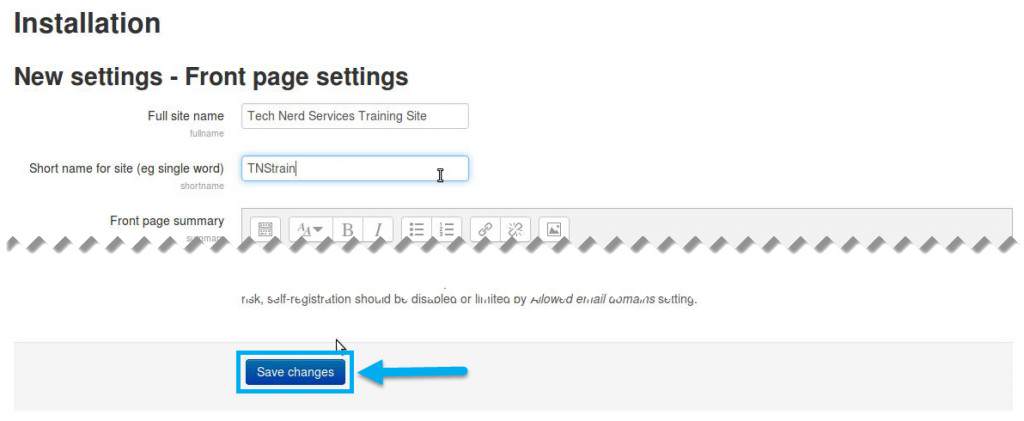
- Setup of Moodle site name and description. Click the “Save Changes” when complete.


Congratulations! Moodle is now setup.

Additional Setup
While Moodle is now fully installed, there are several components that will not function properly without some additional settings.
Setup Email settings
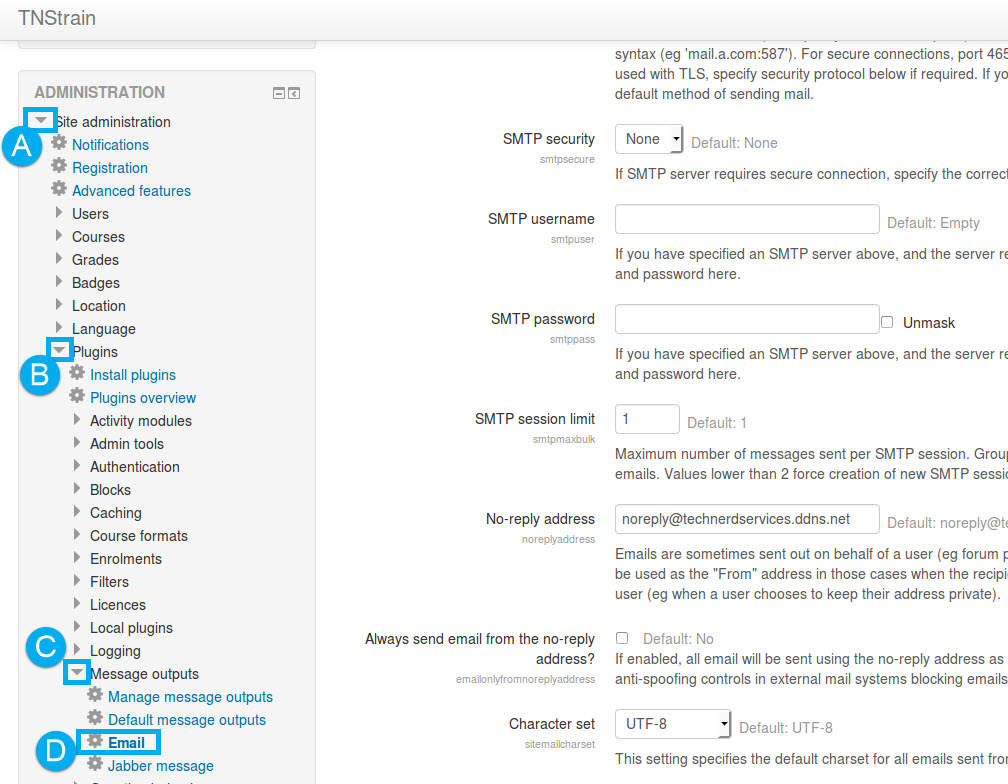
Email settings are needed to send reminders, messages and password reset instructions. The email settings are found in “Site Administration” (A), under “Plugins” (B), then “Message Outputs” (C) and then “Email” (D).
Setup Cron
Cron is used to initiate background processes in Moodle. Without it properly setup, Moodle will not function properly.
- In Terminal, open the cron settings for the webserver user.
sudo crontab -u www-data -e
- Terminal may prompt for a text editor, hit the “Enter” key on the keyboard to select the default, which is nano.
- Scroll to the bottom of the file and enter the command required for background processes to run every 15 minutes.
*/15 * * * * /usr/bin/php /path/to/moodle/admin/cli/cron.php
- Use “CTRL + O” to save the file and “CTRL + X” to exit.
Add System Paths for additional Packages
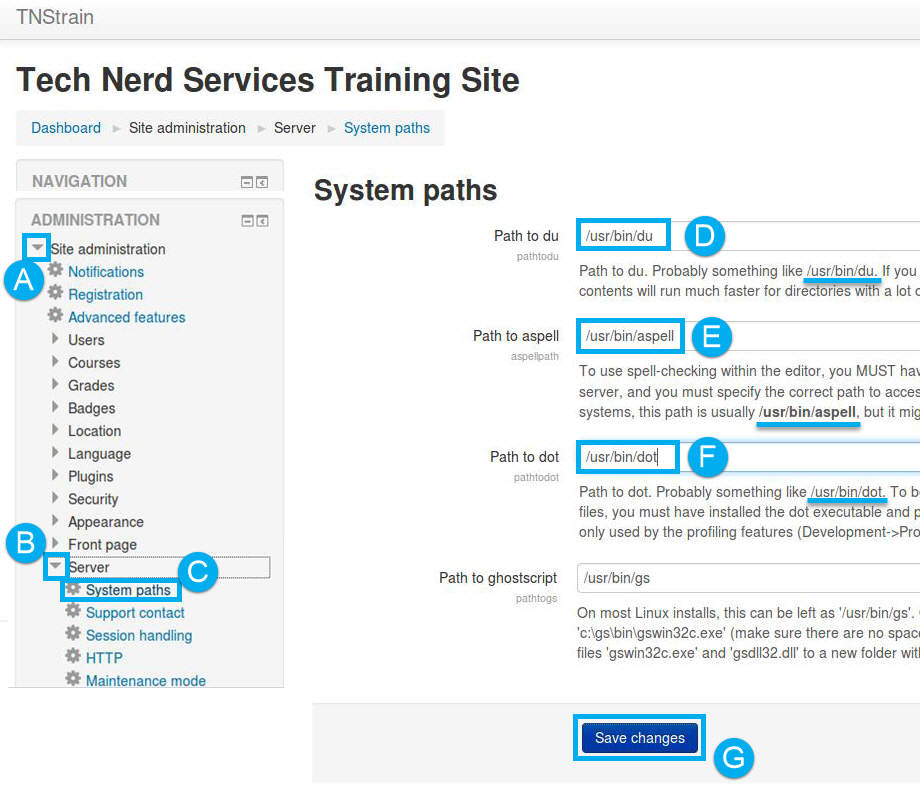
- In Moodle, click on “Site Administration” (A), then click on “Server” (B) and click on “System Paths” (C).
- Copy and paste the default system paths for du (D), aspell (E), and dot (F). The click on the “Save Changes” button (G).
Setup ClamAV AntiVirus
Since very little virus programs function in Linux, ClamAV scans uploaded files for potential viruses that can affect Windows PCs.
- In Terminal, create a folder for quarantined files.
sudo mkdir /var/quarantine
- Grant ownship of the folder to the webserver.
sudo chown -R www-data /var/quarantine
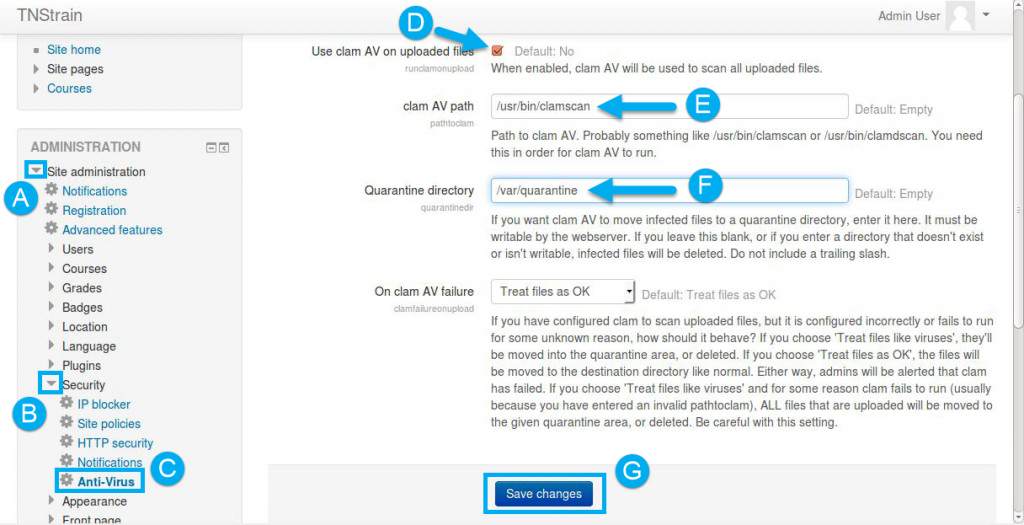
- In Moodle, Click on “Site Administration” (A), then “Security” (B), and then “Anti-Virus” (C).
- Check “Use clam AV on uploaded files (D).
- Type in the system path for clam AV in “clam AV path” (E).
- Type in the directory created for quarantined files (F).

Final Words
Moodle can provide profession training and teaching tools to streamline training new employees or students and keeping them up to date. Addition plugins can add functionality and site and course backups keeps all the information safe. It is easily accessible on any mobile device or desktop computer. All these benefits makes Moodle an effective learning management system.
Support Us!
Thank you for reading this article. If you found it useful, please consider buying us a coffee, subscribing to the YouTube Channel, and/or changing your Amazon bookmark to our affiliate link (CAN, USA, UK). We do this out of general interests and to help others. Thanks!


September 4, 2015 at 3:10 AM
Hi, I have just finished installing Moodle on Ubuntu 14.04 server but clients cannot access the server on the network. Is there any settings to that?
September 5, 2015 at 1:33 PM
Make sure that they are using the same web address that you used while setting up Moodle. I.E, if you use an IP address during setup, then others will need to use the IP address, etc. You can change the site address in Moodles Sites Administration. Good Luck