


Users who transition from Microsoft Outlook to Google Gmail in a business environment find adjusting to managing a single email account from multiple email accounts a challenge. However, with a little setup, a single Gmail account can send and receive from multiple email accounts, Gmail or otherwise.
Contents
Video Tutorial
Setup a Secondary Email to Send As
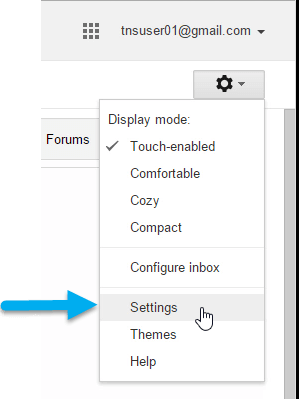
- Click on the Settings gear in the top right corner of Gmail and select “Settings”
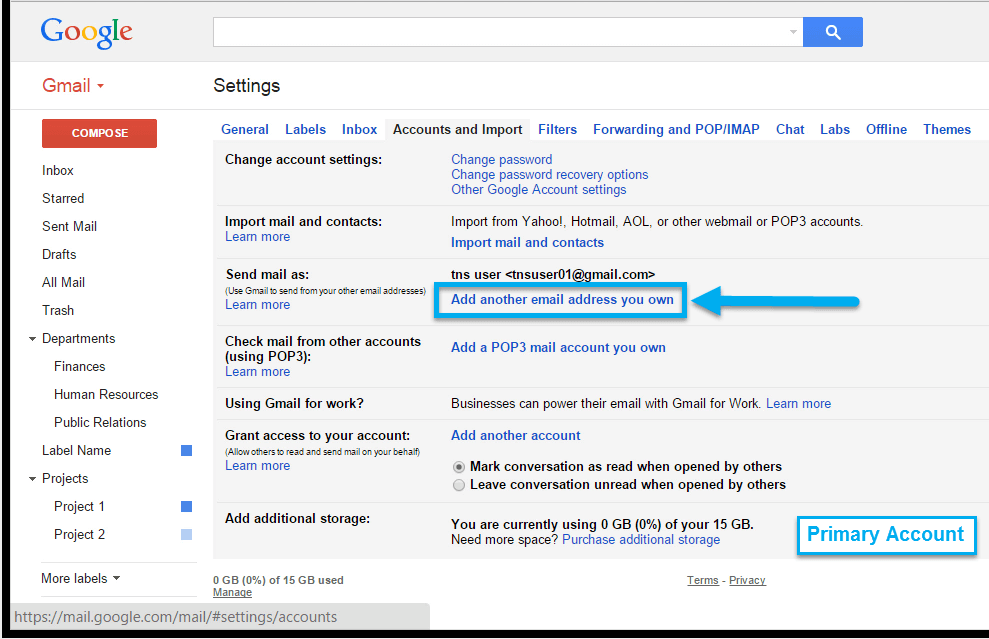
- Click on the “Accounts and Import” tab. In the “Send Mail as” section, click on the “Add another email address you own” link.
- In the pop-up, add the Name and Email address of your secondary email address, and click the “Next Step” button
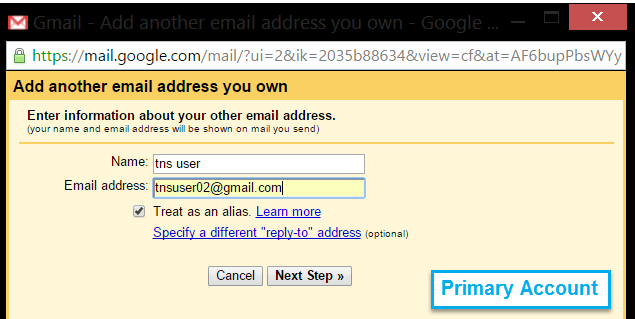 NOTE: The “Treat as an alias” prevents a double forwarding of emails from the secondary account to the primary account. This check box needs to be unchecked if you are in a situation where you are sending emails for another person (like and administrator and assistant).
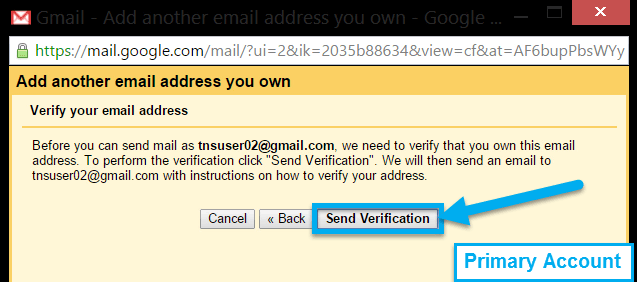
 - The next screen will explain that a verification email needs to be send. Click the “Send Verification” button.
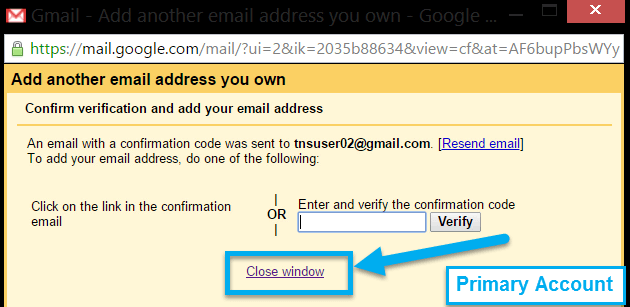
- The final screen explains that a confirmation code needs to be entered or a link in the confirmation email needs to be clicked in order to complete the process. Since you will need to go to the email to find the confirmation code anyway, it will be easier to simply click the link in the verification email. Click the “Close window” link.
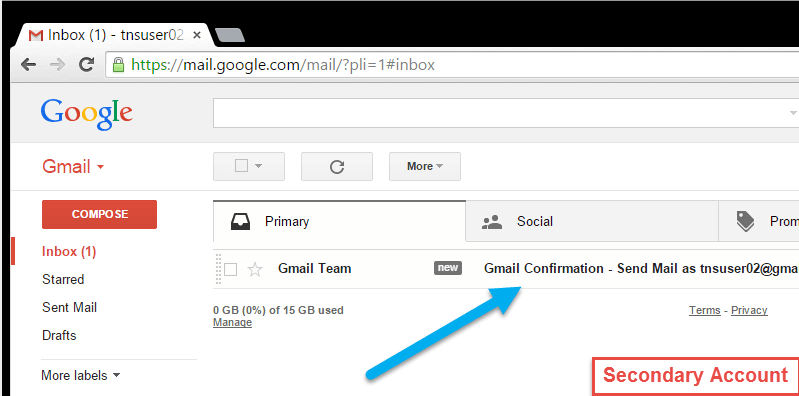
- Log into the secondary email address and click on the new email from the primary email account.
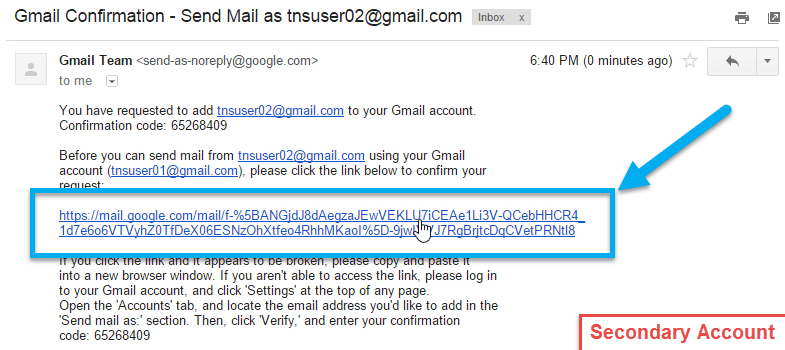
- Click on the link within the email to allow the primary email address to send mail as the secondary email address.
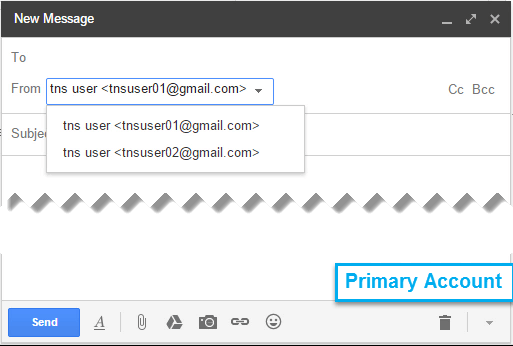
- Return the the primary email account, refresh the page and compose a message. There will be a drop-down menu to choose to send the message as the primary or secondary account.
Setup the Secondary Email to Forward All Mail to the Primary Email
Replies to messages sent as the secondary email account will still arrive at the secondary email account inbox, not the primary account. Therefore, we much forward mail going to the secondary email account inbox to the primary email account.
NOTE: These instructions are for another GMAIL account. However, almost all mail services have a forward all feature. If you are not using another gmail account as the secondary account, search for the appropriate forwarding instructions for your email provider.
- In the Secondary Email account, click on the Settings gear in the top right corner of Gmail and select “Settings”
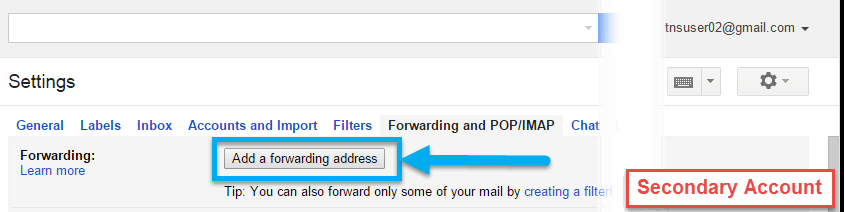
- Click on the Forwarding and Pop/IMAP tab and click the “Add a forwarding address” button
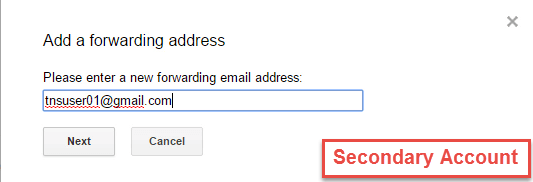
- Enter the primary email address into the email field. Then click the “Next” button.
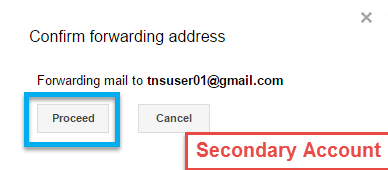
- Confirm the next two pop-ups by clicking on the “Proceed” button and then the “OK” button.

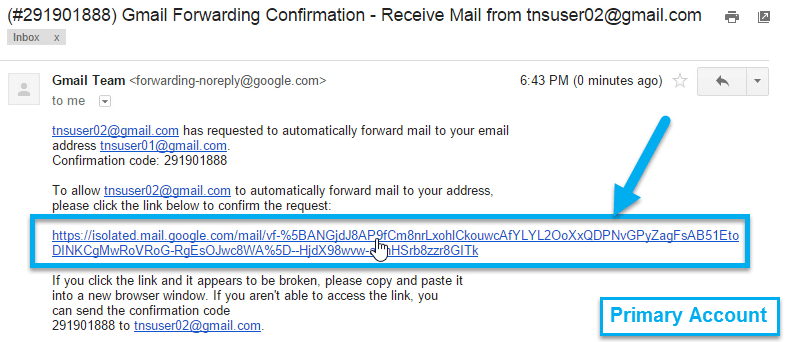
- Log into the primary email account and click on the new email to confirm the mail forward.
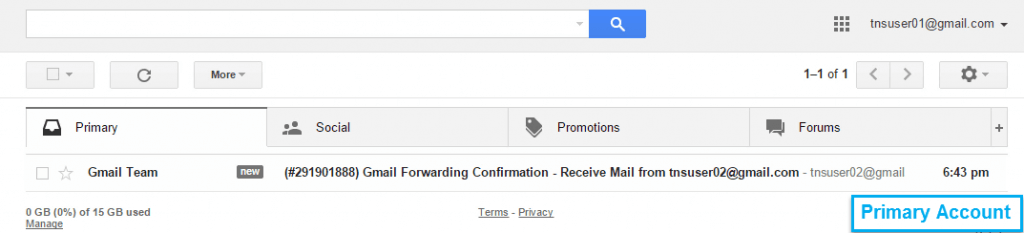
- Click on the link at the center of the message to confirm the mail forward.
- Return to the secondary email account. Refresh the web browser and navigate to the forwarding settings in Settings (Step 1 and 2 in this section).
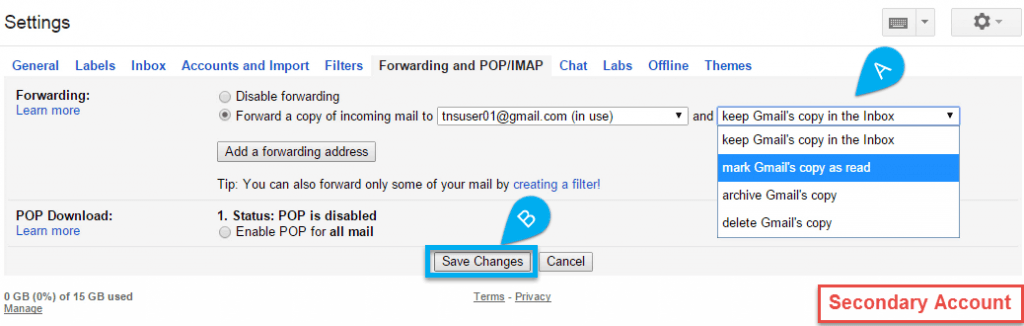
- Select what you would like emails sent to the secondary email account to do in the secondary email account.
- Save the forwarding settings by clicking on the “Save Changes” button.
 NOTE: In the secondary email account, a pink banner will appear for seven days to remind you that all emails are being forwarded to another location.
- (OPTIONAL) In the primary account, in the “Send Mail as” section, select whether replies to emails received by the secondary email account will be from the secondary or primary email accounts.
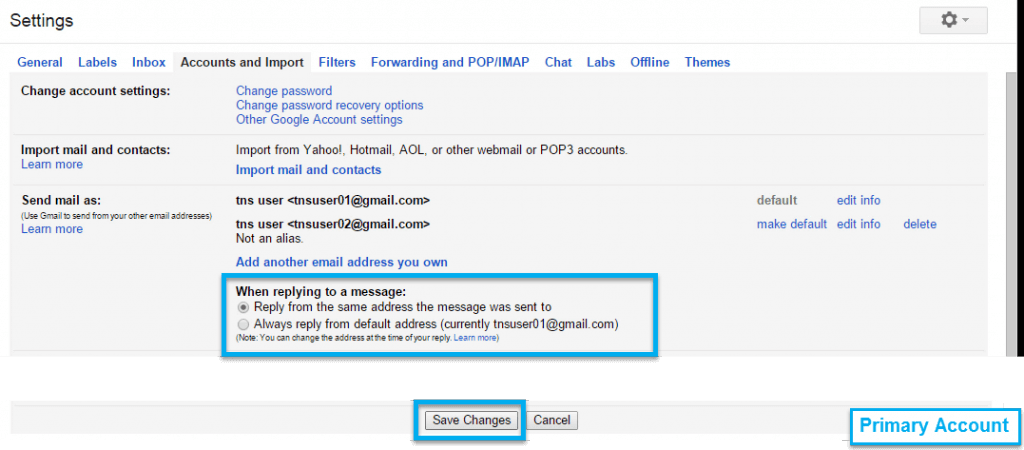
NOTE: I find it easier to have the setting set to “Reply from the same address the message was sent to” to simplify email management.
Create a Filter for Incoming Emails from the Secondary Email
Emails that are forwarded from the secondary account to the primary account have no visual indication that they were addressed to the secondary account. Create a filter to add a label to emails forwarded from the secondary account.
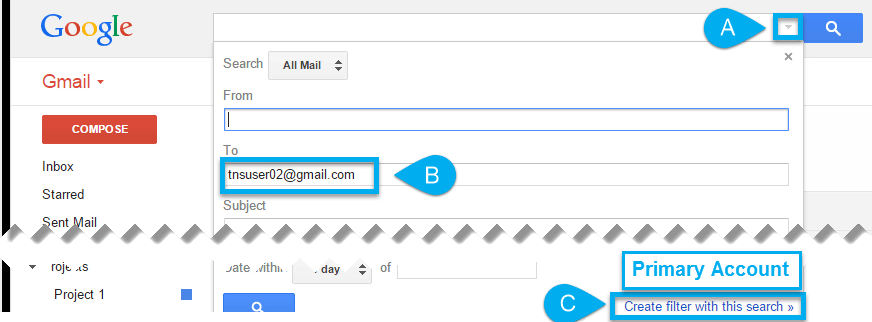
- In the search field, click on the drop-down menu (A). Type in the secondary email address in the “To” field (B) and click the “Create filter with this search »” link (C).
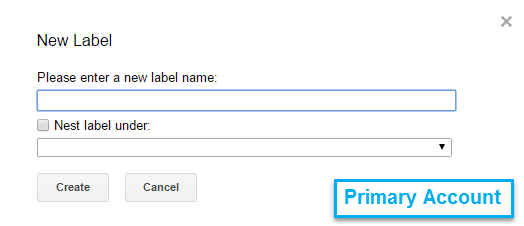
- Check the Check box beside “Apply the label” and in the drop down menu, select a label to assign emails addressed to the secondary email account. Alternatively, you can create a new label by clicking the “New label…” option.
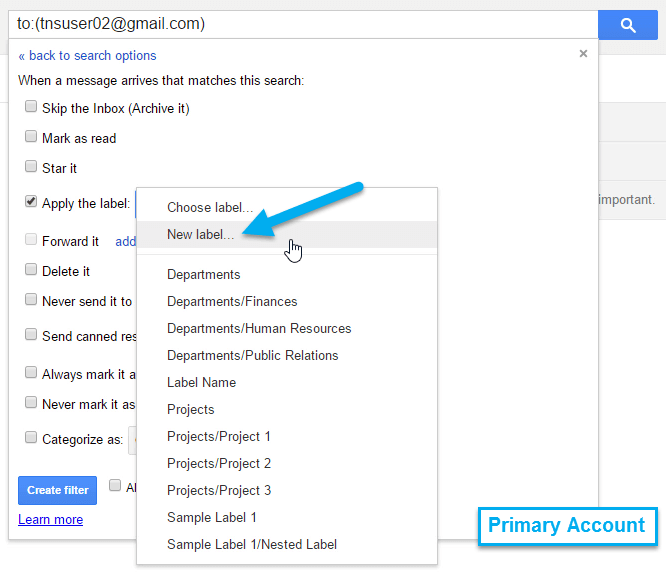
 NOTE: For easier managing, I user the secondary email address as the name of the new label. Then the label will indicate which email the message was addressed to.
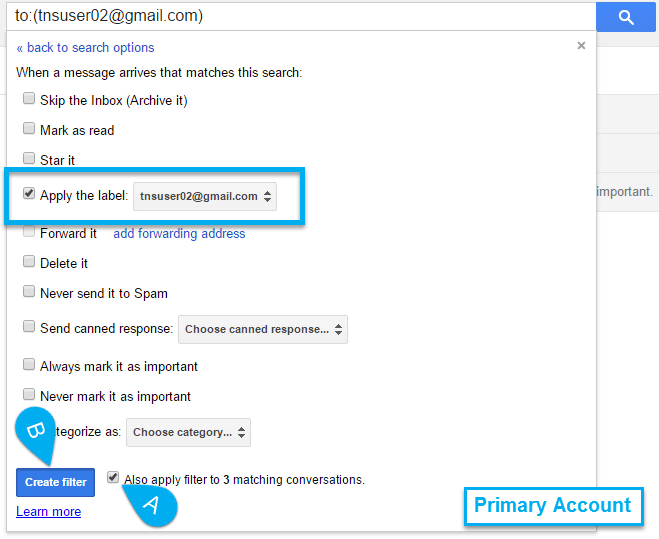
 - Once the label is selected, check the check box to apply the filter to pre-existing messages in your email (A), and then click the “Create filter” button (B).
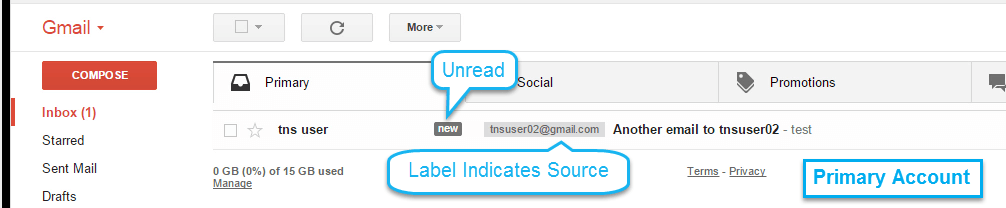
All messages addressed to the secondary email will appear in the primary email with a label indicating which email the message is addressed to.
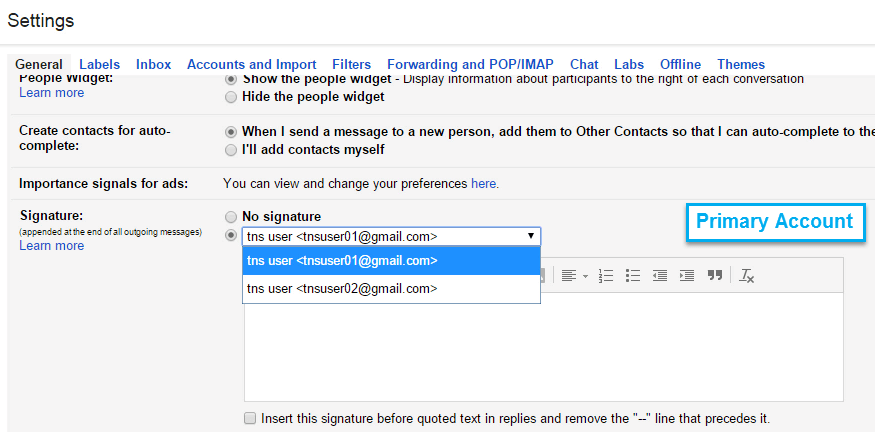
Create a Signature for the Secondary Email (OPTIONAL)
Your secondary email may have a different signature than your primary email. This signature can be added in the primary email account.
- In the Primary Email account, click on the Settings gear in the top right corner of Gmail and select “Settings”
- Scroll halfway down to the signature section. In the drop-down menu, select the secondary account and type the signature in the text field.
- Scroll to the bottom of the page and click the “Save Changes” button.
Final Words
As more businesses and corporations move towards using Google as a service provider, advanced features in Microsoft’s Outlook may appear to be missing. However, just like settings up filters and quick links, those features may just need setup to use.
Support Us!
Thank you for reading this article. If you found it useful, please consider buying us a coffee, subscribing to the YouTube Channel, and/or changing your Amazon bookmark to our affiliate link (CAN, USA, UK). We do this out of general interests and to help others. Thanks!


Leave a Reply